If you've ever seen those tiny, intensely green shoots on a restaurant plate and wondered what they were — those are microgreens. And the surprising truth is that you can grow them yourself, in your kitchen, with no garden, no outdoor space, and no experience.
This guide covers everything you need to know about how to grow microgreens at home. What they are, why they're worth growing, exactly what you need, and a simple step-by-step process that takes most beginners from seed to first harvest in 7 days or less.
If you've never grown anything before, that's fine. This is exactly where to start.
What Are Microgreens (and Why Are They Different from Sprouts)?
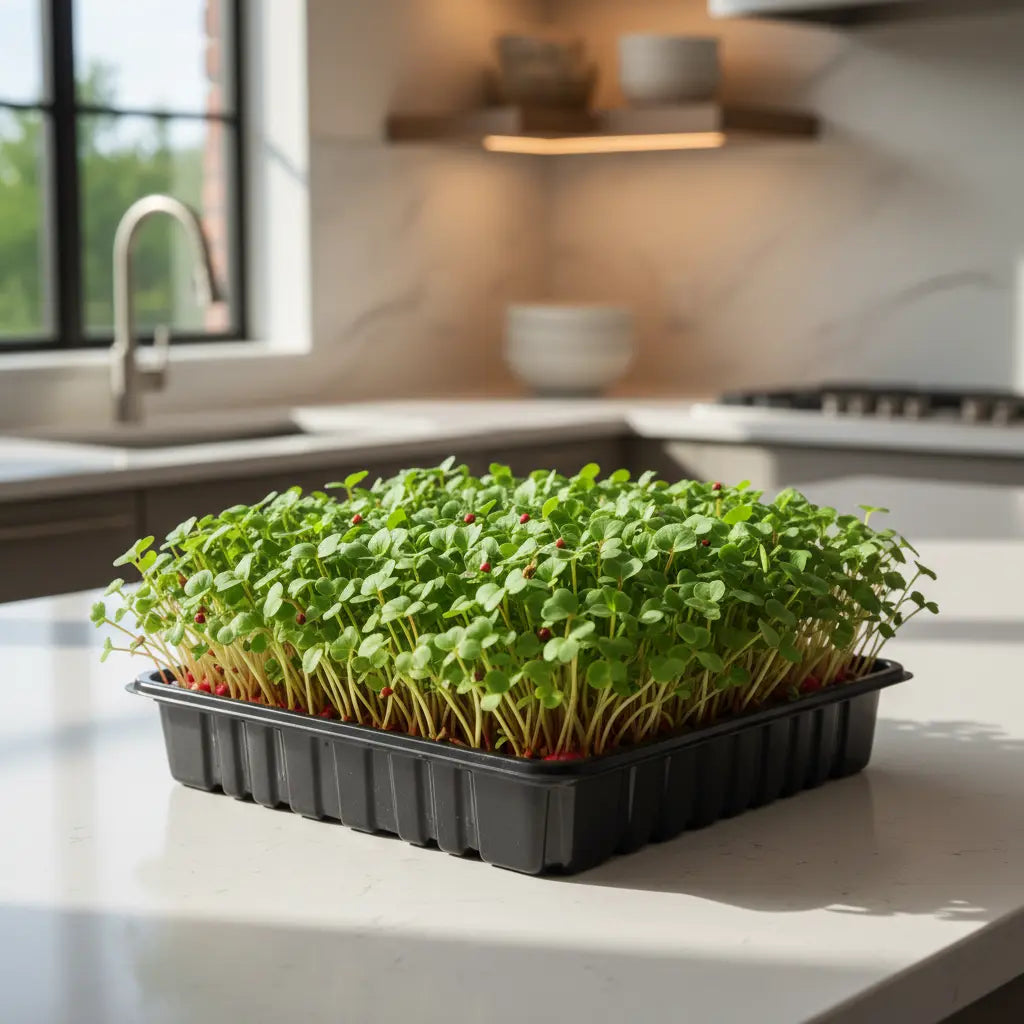
Microgreens are young vegetable and herb seedlings harvested just after the first true leaves appear — usually between 7 and 14 days after planting. They're not sprouts (which are germinated seeds eaten whole, roots and all), and they're not baby salad greens (which grow longer). Microgreens sit in their own category: more developed than a sprout, much younger than a full plant.
What makes them interesting isn't just the size. Studies have found that microgreens can contain significantly higher concentrations of vitamins and antioxidants than their full-grown counterparts — in some cases, several times more. You're getting a lot of nutrition in a very small package.
They're also genuinely versatile. Toss them on eggs, blend them into smoothies, layer them in sandwiches, or eat them straight from the tray. The flavor ranges from mild and nutty (sunflower, pea) to sharp and peppery (radish, arugula) depending on the variety.
Why Grow Your Own Microgreens at Home?
Store-bought microgreens are expensive — often $5 to $8 for a small clamshell that wilts within days of purchase. When you grow your own microgreens indoors, the economics flip entirely.
A single pack of seeds yields multiple trays. The growing window is so short — 7 to 14 days — that you can stagger trays and have a continuous harvest rather than one big batch. And because you harvest right before eating, the freshness and flavor are incomparably better than anything that's been sitting in refrigerated transit for a week.
There's also the simplicity factor. Growing microgreens indoors for beginners is genuinely one of the most forgiving things you can grow. No seasons, no weather, no waiting months for results. You plant on Monday; you eat by next week.
If you're coming to microgreens from a broader interest in growing your own food, our guide to why microgreens are the easiest way to grow your own food covers the bigger picture well.
What You Need to Grow Microgreens at Home
You don't need much. That's one of the best things about microgreens. Here's a straightforward list:
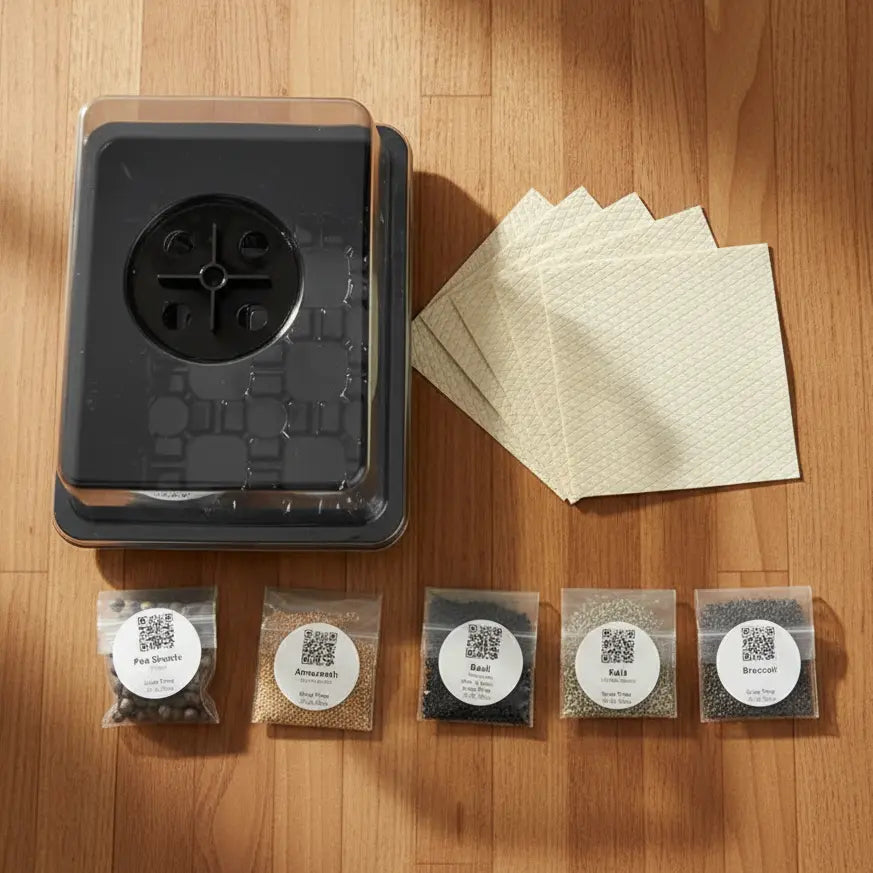
- Growing trays — Shallow trays roughly 10x20 inches work well. You'll want two: one with drainage holes for planting, one solid tray underneath to catch water.
- Growing medium — A thin layer of potting mix, coconut coir, or a hydroponic grow pad. Microgreens don't need deep soil — their roots only need about an inch.
- Seeds — Specifically labeled as microgreen or sprouting seeds, which are untreated and sold at appropriate density. Regular garden seeds work too, but microgreen-specific seeds are more reliable.
- A spray bottle — For misting. Overwatering is the most common beginner mistake; a spray bottle gives you control.
- Light — A bright windowsill works in a pinch, but a simple grow light gives far more consistent results, especially in winter or low-light apartments.
- A lid or cover — Any flat cover to create darkness during germination. The lid from the tray set, a sheet of cardboard, or a second tray flipped upside down.
The Easiest Starting Point for Beginners
If sourcing all of this separately sounds like a lot of back-and-forth, the Aquager Microgreens Starter Kit was put together specifically to solve that. It includes the trays, grow medium, and a curated selection of beginner-friendly seeds — everything in one box so your first grow isn't derailed by a missing piece. For a first-timer, it's the most frictionless way to start.
How to Grow Microgreens Step by Step
This process works for the vast majority of microgreen varieties. Follow it your first time, then adjust as you get a feel for different seeds.
Step 1: Prepare Your Tray
Fill your drainage tray with about 1 to 1.5 inches of growing medium. Press it down lightly so the surface is even — not compacted, just level. An uneven surface leads to uneven germination.
Moisten the medium thoroughly before seeding. It should feel like a wrung-out sponge: damp throughout, not soggy. If water pools on the surface, it's too wet.
Step 2: Sow the Seeds
Scatter seeds evenly across the surface. Microgreens are grown densely — more like a lawn than a garden. You want the seeds touching but not piled on top of each other.
For most varieties, about 1 to 1.5 ounces of seeds covers a standard 10x20 tray well. Larger seeds like sunflower and peas can be pre-soaked for 6–8 hours beforehand to speed germination. Smaller seeds like radish and broccoli can go straight in dry.
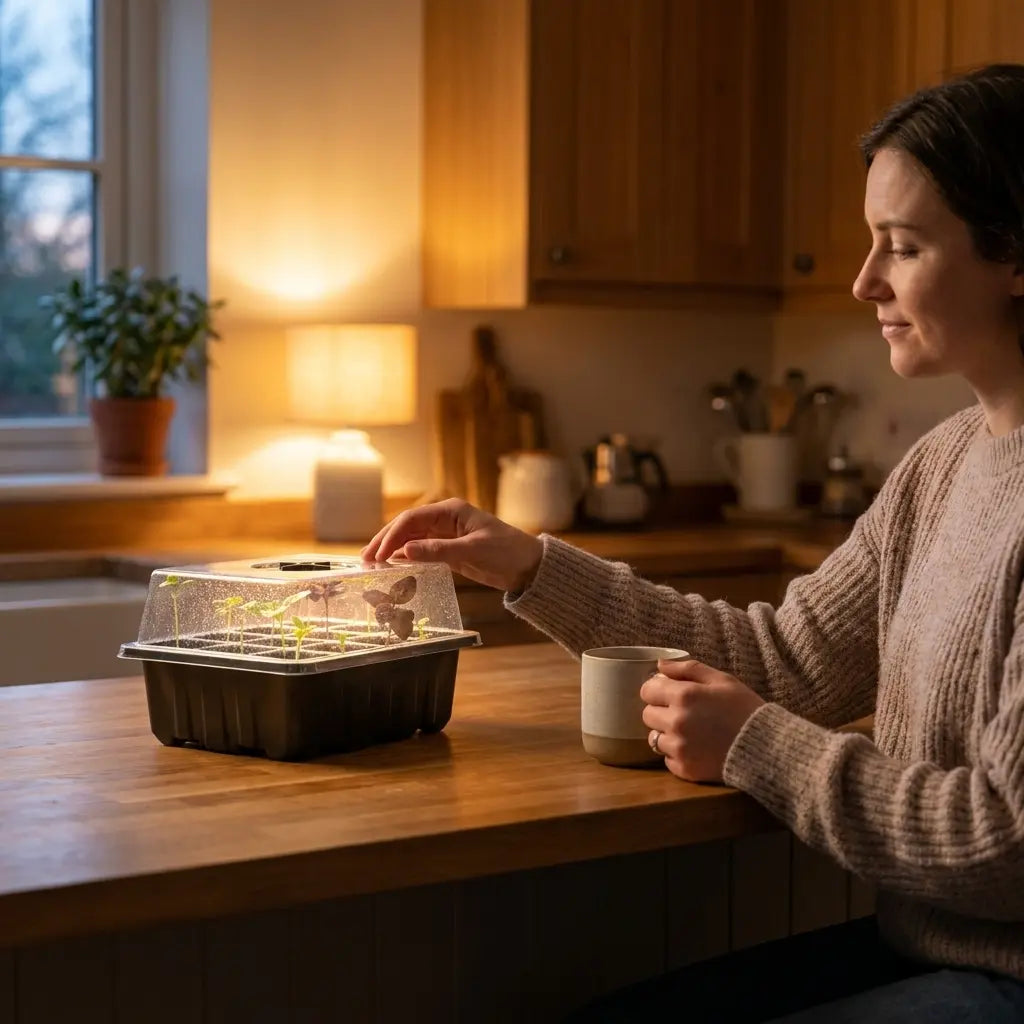
Step 3: Cover and Let Them Germinate
Mist the seeds lightly and cover the tray. This creates the darkness and humidity seeds need to germinate. Place the covered tray somewhere at room temperature — a countertop, a shelf, inside a cabinet.
Check once a day. Mist lightly if the surface looks dry. Most varieties will show germination within 24 to 48 hours.
Step 4: Uncover and Move to Light
Once most seeds have germinated and the shoots are pushing up against the cover — usually day 3 or 4 — remove the cover and move the tray to your light source.
This is when the green color develops. Chlorophyll production kicks in within hours of light exposure. The transformation is fast and satisfying to watch.
Step 5: Water from Below
Switch from misting to bottom watering once the cover comes off. Pour a small amount of water into the solid bottom tray and let the growing medium absorb it from below. This keeps the leaves dry (reducing mold risk) and encourages roots to grow downward.
Water once a day or when the bottom tray is dry. Less is more — if you see yellowing or sliminess, you're watering too much.
Step 6: Harvest
Microgreens are ready to harvest when the first true leaves appear — the second set of leaves after the initial seed leaves. For most varieties, this is day 7 to 12.
Harvest with clean scissors, cutting just above the soil line. Rinse gently, spin or pat dry, and use immediately for peak flavor — or store in a sealed container in the fridge for up to 5 days.
The Best Microgreens to Grow Indoors as a Beginner
Not all microgreens are equally forgiving. Some are nearly foolproof; others require more precision. Here are the best starting varieties:
- Radish Confetti Mix Microgreens — Germinate in 2–3 days, harvest in 6–8 days, spicy and bold. One of the fastest and most reliable varieties available.
- Pea Shoots Field Microgreens — Mild, sweet, and substantial. Larger seeds that are easy to handle. One of the most beginner-friendly options.
- Sunflower Black Oil Microgreens — Nutty, satisfying, and thick-stemmed. Soak seeds overnight first. Harvest around day 10–12.
- Broccoli Microgreens — Tiny seeds, mild flavor, impressively nutritious. Very dense growers — a little seed goes a long way.
- Arugula Microgreens — Peppery and intense. Tiny seeds that need no pre-soaking. Fast and reliable.
Start with radish or peas for your first grow. Both are forgiving about timing, temperature, and watering — ideal for building confidence before trying more finicky varieties. For a broader look at which varieties work best, see our guide to 7 microgreens you can't mess up.
Your First Harvest in 7 Days: The Aquager Microgreens Starter Kit
The most common reason people don't start growing microgreens isn't lack of interest — it's the friction of figuring out what to buy, where to buy it, and whether they're getting the right things.
The Aquager Microgreens Starter Kit removes all of that. It's designed specifically for first-time growers: the right trays, the right growing medium, and a selection of beginner-friendly seeds chosen because they germinate reliably and taste great. Everything arrives together, nothing is missing, and the first grow can start the same day the kit arrives.
For anyone who wants their first harvest in 7 days without a research project beforehand, this is the most direct path.
Frequently Asked Questions About Growing Microgreens at Home
Do microgreens need soil to grow?
No — microgreens grow well without soil. Coconut coir, hemp grow mats, and hydroponic pads all work. Learning how to grow microgreens without soil is actually easier for beginners because there's less mess and more consistent moisture control.
How much light do microgreens need?
About 12–16 hours of light per day. A south-facing windowsill can work in summer, but a basic LED grow light gives more consistent results year-round and is especially important in apartments with limited natural light.
Why are my microgreens falling over (damping off)?
This is usually caused by overwatering, poor air circulation, or seeding too densely. If shoots are wilting at the base, reduce watering immediately, move to better airflow, and ensure the cover comes off as soon as seeds germinate.
Can I regrow microgreens after cutting?
Most microgreens won't regrow after the first harvest. They put all their energy into that first flush of growth. The exceptions are pea shoots, which sometimes produce a second smaller cut. In general, plan to reseed after each harvest.
How do I store harvested microgreens?
Harvest dry, store in a sealed container or zip bag with a paper towel to absorb moisture, and refrigerate. Most varieties stay fresh and crisp for 4–5 days. For best flavor, eat within 2 days of harvest.
Conclusion: Your First Tray Starts Today
Growing microgreens at home is genuinely one of the most accessible things a first-time grower can do. No outdoor space, no special skills, no long wait. A tray of seeds planted today becomes a real, flavorful harvest by this time next week.
Start with radish or pea shoots, follow the steps above, and don't overthink the first grow. The learning curve is short, and the results come fast enough that any mistakes are easy to correct on the next tray.
When you're ready to start, the Aquager Microgreens Starter Kit has everything you need in one place — trays, medium, and beginner seeds, ready to go.
Get Your Starter Kit and Harvest in 7 Days →
Author: Aquager
Published: May 24, 2026
Updated: May 24, 2026


0 comments