Many people assume that to grow microgreens at home takes months of effort. Traditional gardens follow long seasonal cycles. Seeds are planted in spring and harvested weeks or months later. For beginners, this timeline can feel intimidating.
Microgreens change that expectation completely.
It is possible to grow microgreens at home in less than 10 days, even inside a small apartment. These tiny plants grow quickly and require very little space. A shallow tray, water, and consistent light are usually enough to begin seeing results.
Microgreens are young vegetable plants harvested shortly after sprouting. Instead of waiting for the plant to mature, growers harvest them at the early leaf stage. This stage often appears within a week of planting.
Because the growth cycle is so short, beginners receive feedback almost immediately. Seeds sprout in just a few days. Thin stems begin to rise above the surface. Within a week, small green leaves appear across the tray.
This rapid progress makes microgreens one of the easiest foods to grow indoors.
Most people begin growing microgreens because they want fresh greens at home. Others simply enjoy watching plants grow quickly. In both cases, the short timeline removes much of the frustration beginners often experience with traditional gardening.
This issue shows up much faster indoors, because light, airflow, and watering margins are tighter — which is why beginners sometimes think they’re doing something wrong when plants behave differently inside apartments.
The truth is that microgreens are naturally suited for indoor environments. Their roots remain shallow. Their growth period is short. They do not require deep soil or large containers.
Instead of waiting months for harvest, many microgreens reach the ideal stage within 7 to 10 days.
This quick cycle makes microgreens perfect for beginners who want to see success quickly. Each growing cycle becomes a small experiment. If something does not work, the next batch can begin immediately.
Over time, growers develop a simple routine. Seeds are planted. Sprouts appear within days. Leaves expand and fill the tray. Then the greens are harvested and the process begins again.
If you are completely new to growing microgreens, it helps to understand the basic principles behind the process.
👉 How to Grow Microgreens at Home
This guide explains the full process step by step and shows how indoor growing systems work.
Once you understand these basics, growing microgreens becomes one of the fastest ways to produce fresh food indoors.

Why Microgreens Grow Faster Than Most Plants
One of the reasons beginners quickly learn to grow microgreens at home is simple: microgreens grow much faster than traditional plants.
Most vegetables require time to develop roots, stems, leaves, and eventually fruit. Tomatoes, peppers, and lettuce may take weeks before they are ready to harvest. During that time, plants must grow strong stems and deep root systems.
Microgreens follow a different timeline.
Instead of waiting for the plant to mature, growers harvest the plant very early in its life cycle. The greens are cut shortly after the first leaves appear. At this stage, the plant is still small, but it already contains the flavor and nutrients of the full vegetable.
Because the harvest happens so early, the entire growth cycle becomes extremely short.
Most microgreens sprout within two to three days. After that, the plants spend several days growing upward and developing their first leaves. By the end of the first week, the tray often looks like a small field of green stems.
Within 7 to 10 days, many varieties are ready to harvest.
This quick cycle is why so many beginners choose microgreens when learning to grow food indoors.
Another reason microgreens grow quickly is their root system. Unlike mature plants, microgreens do not need to develop deep roots. Their roots remain shallow and focus mainly on absorbing moisture and nutrients during the short growth period.
Because of this, microgreens can grow in shallow trays with minimal growing medium.
Light requirements are also different from mature plants. Microgreens do not need intense sunlight for long periods. They mainly require consistent light during the short growth phase. This makes them well suited for indoor spaces near windows or under simple grow lights.
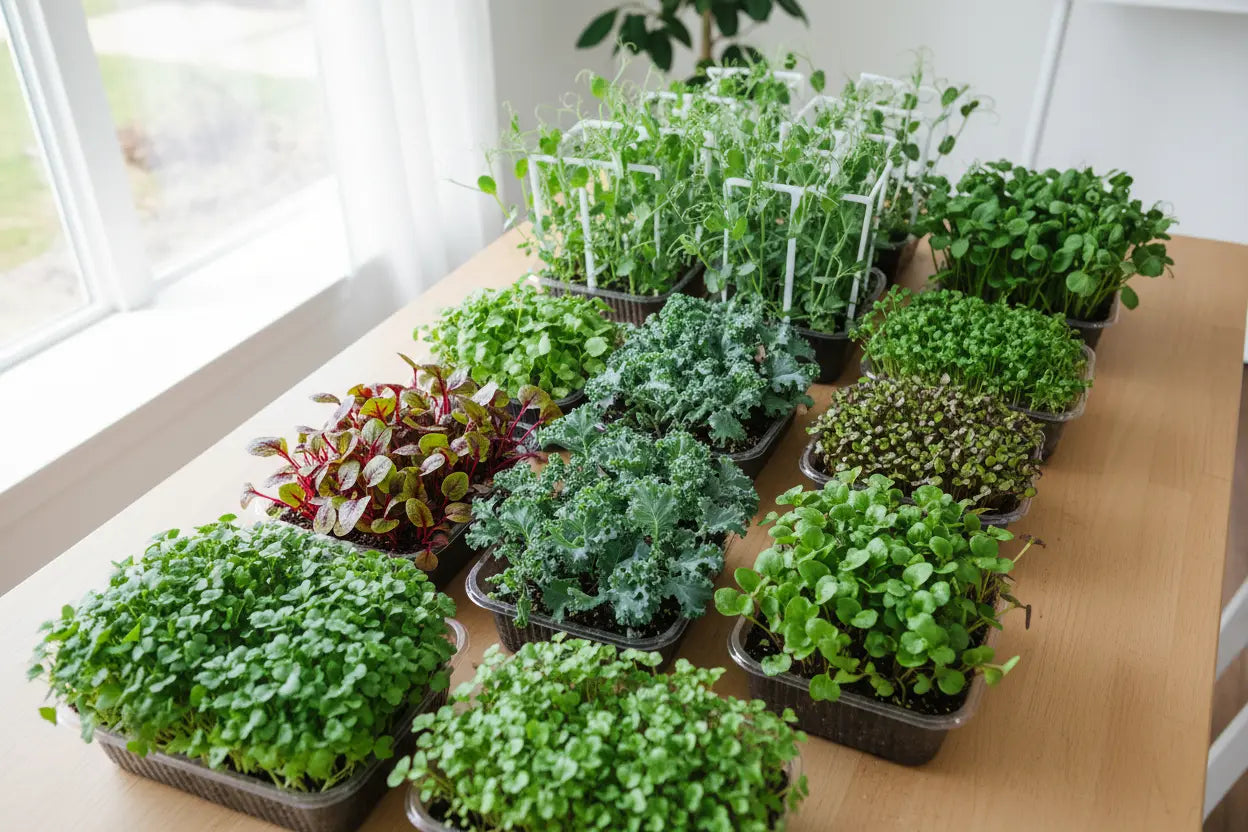
Certain varieties are especially popular because they grow quickly and reliably indoors.
Some of the fastest microgreens include:
- Broccoli microgreens – mild flavor and reliable germination
- Radish microgreens – very fast growth and strong flavor
- Kale microgreens – steady growth and delicate leaves
- Mustard microgreens – quick sprouting and vibrant greens
- Pea shoots – slightly slower but very vigorous growth
These varieties are often recommended for beginners because they sprout consistently and tolerate small indoor environments.
Radish microgreens are particularly fast. In many trays, radish seeds germinate within two days and produce strong stems within a week. This fast growth makes them one of the easiest microgreens to grow at home.
Broccoli and kale microgreens are also popular because they produce dense, uniform trays. Their mild flavor works well in salads, sandwiches, and many simple dishes.
Pea shoots behave slightly differently. They grow taller than most microgreens and produce delicate curling tendrils. Although they sometimes take a few extra days to reach harvest, they often grow vigorously once sprouted.
The important point is not which specific variety you choose. What matters is that microgreens naturally grow quickly during their early stage.
This fast growth changes the experience of gardening.
Instead of waiting weeks to see results, beginners see progress almost immediately. Seeds sprout within days. Green leaves spread across the tray. By the end of the first week, the plants are already approaching harvest size.
For people learning to grow microgreens at home, this quick feedback makes the process feel simple and rewarding.

What You Actually Need to Grow Microgreens at Home
One reason many beginners choose microgreens is how little equipment they require. Traditional gardening often involves tools, soil preparation, and outdoor space. Microgreens simplify the process dramatically.
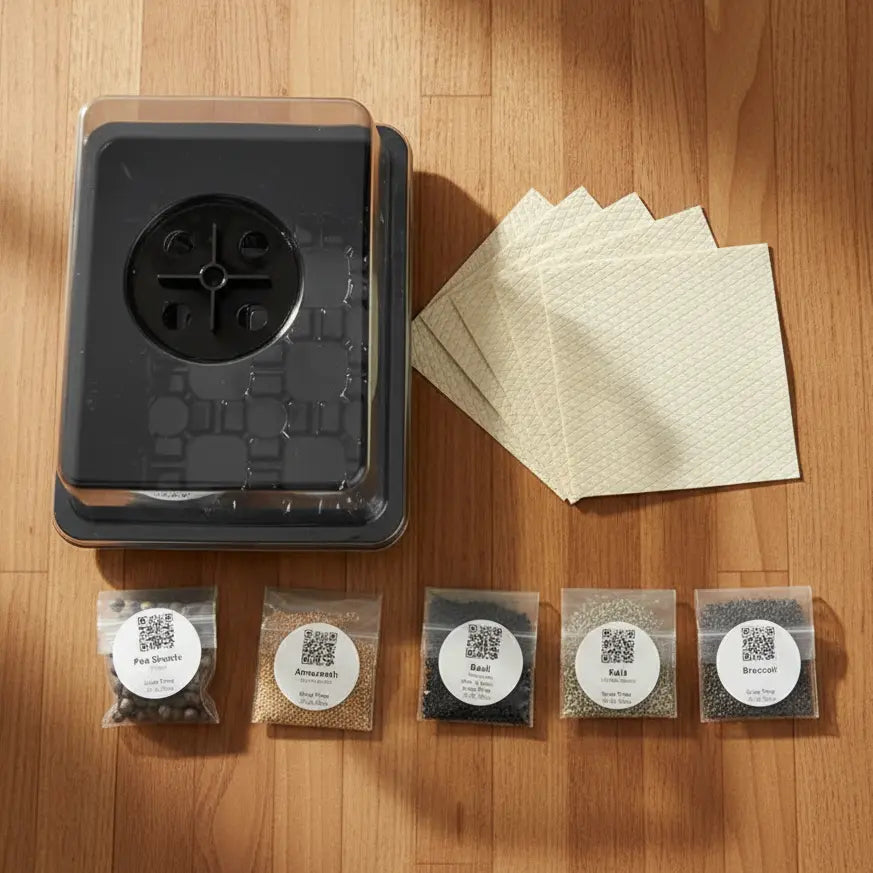
In most cases, people can grow microgreens at home using only a few basic items.
The most important element is a shallow growing tray. Microgreens do not need deep containers because their roots remain small during the short growth cycle. A shallow tray allows seeds to spread evenly while holding enough moisture for the plants to develop.
The growing medium is the second important component. This layer holds moisture and supports the seeds as they sprout. Many growers use soil-based mixes, while others prefer fiber mats or similar materials designed for seed sprouting.
Because microgreens grow for only a short period, the growing medium mainly serves as support rather than long-term nutrition. The seeds themselves contain most of the energy the plant needs during early growth.
Water is the next essential element.
Microgreens depend on consistent moisture, especially during the first few days after planting. Seeds absorb water quickly as they begin the germination process. Once sprouting begins, the roots continue drawing moisture from the tray.
However, microgreens usually require much less water than beginners expect. Too much moisture can slow growth or create poor airflow conditions around the plants. Most successful trays stay lightly moist rather than saturated.
Light also plays an important role during the growth stage.
After seeds germinate, the young plants begin reaching toward light. This is when the tray transforms from tiny sprouts into a dense carpet of green stems. Natural daylight from a nearby window often works well for small trays.
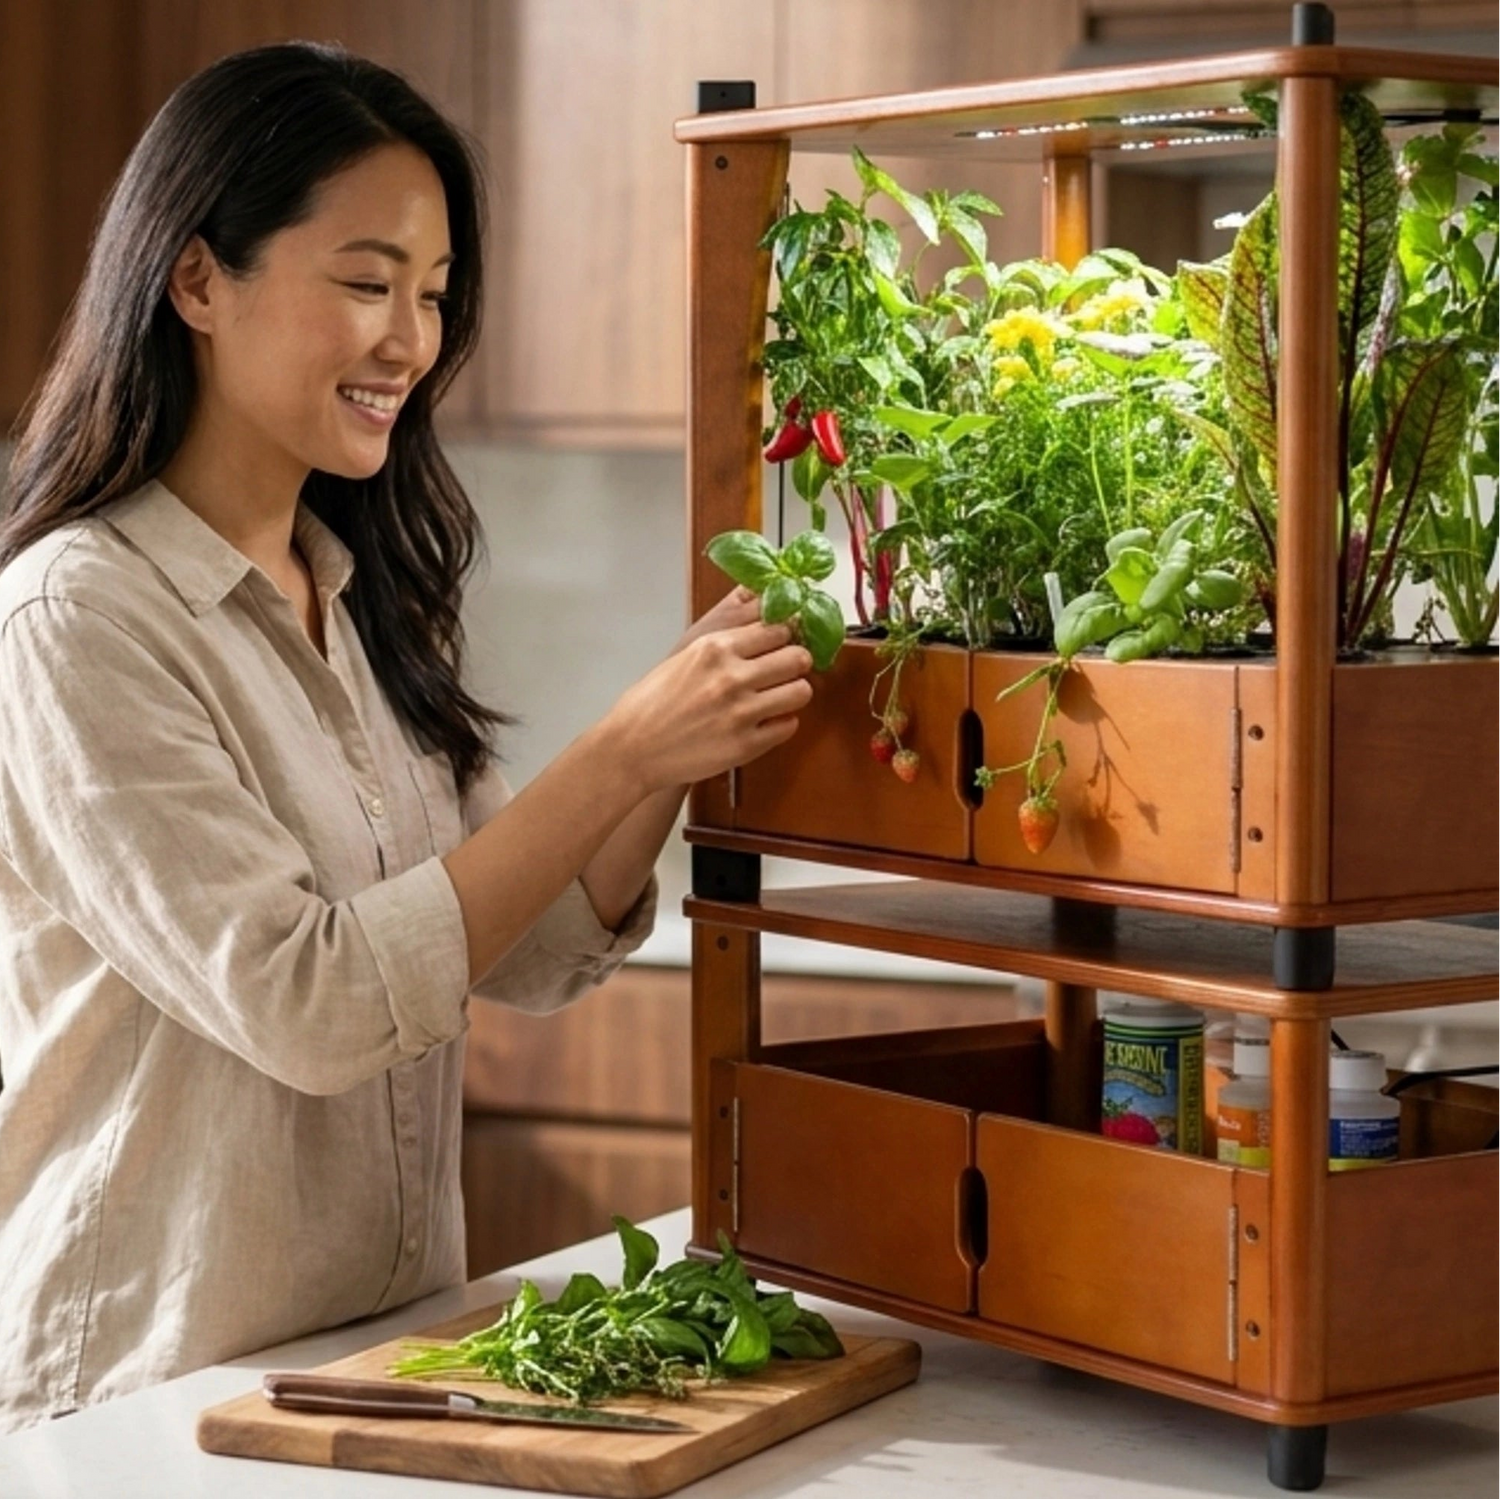
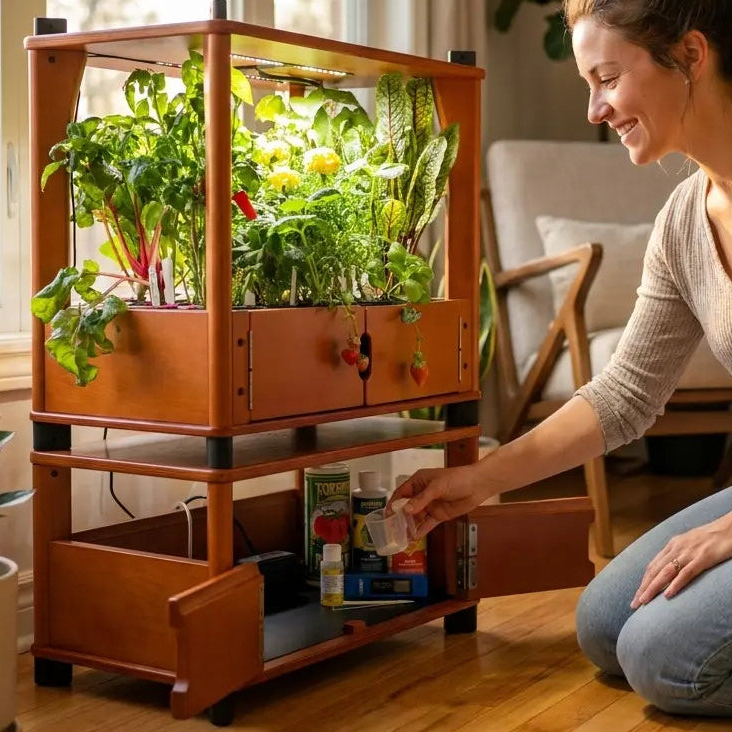
Many indoor growers also use simple grow lights to provide consistent brightness. These lights help maintain steady growth, especially in apartments where sunlight may be limited.
Airflow is another factor that influences healthy growth. Microgreens grow very close together in dense trays. Good air movement helps prevent excess moisture from collecting around the stems.
In many homes, normal room airflow is enough. Opening windows occasionally or placing trays where air circulates naturally can help maintain balance.
Because the setup is so simple, many beginners are surprised by how quickly their trays begin to change. Seeds absorb moisture and begin swelling within hours. Sprouts emerge from the surface shortly afterward.
Within several days, the tray often fills with small green shoots reaching upward toward light.
This transformation is one of the reasons microgreens are so popular with first-time growers. The process is visible, fast, and easy to repeat.
Instead of managing large garden beds, beginners can focus on a small controlled environment. Each tray becomes a short growing cycle that starts and finishes within days.
If you want a full explanation of the growing process and how each stage works, this guide walks through the details clearly.
👉 How to Grow Microgreens at Home
Understanding the full process helps beginners feel more confident about starting their first tray.
Once the basics become familiar, growing microgreens at home often becomes one of the easiest ways to produce fresh greens indoors.

A Typical 10-Day Microgreens Growth Timeline
One of the reasons people decide to grow microgreens at home is the short timeline. Many plants require weeks before anything visible happens. Microgreens behave differently.
In most trays, the first signs of life appear within just a few days. Small stems push upward through the growing medium. Within a week, a dense layer of green leaves begins to fill the tray.
This quick transformation makes microgreens ideal for beginners. The process moves fast enough that people stay engaged from start to harvest.
While every variety grows slightly differently, the early stages usually follow a predictable pattern. Understanding this timeline helps beginners know what to expect during each phase of growth.
Days 1–2: Seeds Absorb Water and Begin Germinating
The process begins as soon as seeds absorb moisture.
During the first day, the seeds swell as they take in water from the growing medium. This triggers the biological process known as germination. Inside the seed, stored nutrients begin activating growth.
At this stage, nothing may appear above the surface yet. However, important changes are already happening. The seed coat softens, and the first root structures begin forming.
By the end of the second day, some seeds may begin pushing tiny white roots downward into the growing medium. These roots anchor the plant and start absorbing moisture.
For beginners learning to grow microgreens at home, this stage often requires patience. Even though little is visible yet, the seeds are already preparing for rapid growth.

Days 3–4: Sprouts Begin to Appear
Around the third day, the tray begins to change quickly.
Small curved stems start pushing upward through the growing medium. These early sprouts are usually pale or slightly yellow at first. The lack of color simply means the plants have not yet received enough light.
As the sprouts rise toward light, they begin producing chlorophyll. This is the pigment that gives plants their green color. Once exposed to light, the stems gradually turn bright green.
During this stage, the tray may look uneven. Some sprouts emerge faster than others. This variation is normal and usually balances out as the plants continue growing.
For fast varieties like radish or broccoli microgreens, this stage can happen surprisingly quickly. Many growers begin seeing dozens of tiny stems covering the tray within a few days.
Days 5–7: The Tray Fills With Young Microgreens
The middle of the growth cycle is often the most exciting stage.
By the fifth day, most trays begin to look noticeably greener. The sprouts grow taller and start developing their first small leaves. These leaves are called cotyledons, which are the first leaves a seed produces.
During this phase, the tray often transforms from scattered sprouts into a dense carpet of green stems. The plants begin competing for light, encouraging them to grow upward.
This upward growth creates the familiar microgreens appearance: slender stems topped with small leaves.
Fast varieties like kale, mustard, and broccoli microgreens usually grow very evenly during this stage. Their leaves spread out and begin covering the entire surface of the tray.
Because growth is so rapid, beginners often feel surprised by how much the tray changes in just a few days.

Days 8–10: Microgreens Reach Harvest Stage
The final stage of the cycle happens quickly.
Around the eighth day, the leaves expand further and the stems grow stronger. The tray now looks like a small field of green plants standing close together.
At this point, many varieties reach their ideal harvest stage.
Microgreens are usually harvested when the stems are several inches tall and the first leaves are fully formed. The plants remain tender and flavorful at this stage.
Harvesting earlier keeps the texture delicate and the flavor concentrated. Waiting longer may cause the plants to develop stronger flavors or tougher stems.
Fast varieties such as radish microgreens can sometimes reach harvest in as little as a week. Others, like pea shoots, may take slightly longer but often grow taller and more vigorous.
For beginners learning to grow microgreens at home, this moment can feel surprisingly rewarding. Just days after planting seeds, the tray is filled with edible greens ready to harvest.
After harvesting, the cycle begins again.
Many growers start another tray immediately, creating a steady rhythm of planting, growing, and harvesting throughout the month.

Why Beginners Succeed With Microgreens
Many people hesitate to start gardening because they expect the process to be difficult. Traditional gardening often involves learning about soil types, outdoor conditions, pests, and long growing seasons. For beginners, this amount of information can feel overwhelming.
Microgreens remove many of these barriers.
Because the growth cycle is so short, beginners who grow microgreens at home often experience success much faster than with traditional plants. Seeds sprout within days, and the tray visibly changes every morning. This quick feedback makes the process feel rewarding instead of frustrating.
Small space requirements also make microgreens easier to manage. Unlike outdoor gardens that require large beds or containers, microgreens grow in shallow trays. These trays can fit on kitchen counters, windowsills, or small shelves.
For people living in apartments or urban environments, this compact setup makes growing food much more accessible.
Another reason beginners succeed with microgreens is the simplicity of the growing cycle. Instead of managing plants for months, growers focus on a short routine that repeats every week or two.
The process becomes familiar quickly. Seeds are planted. Sprouts appear. Leaves expand. Then the greens are harvested and the tray resets.
Each cycle becomes a small learning opportunity. If something does not work perfectly, the next tray can begin right away. This quick reset removes much of the pressure beginners often feel when starting new hobbies.
Microgreens also grow densely, which creates a satisfying visual result. Within days, a tray can look full and vibrant. The surface becomes covered with tiny green stems reaching toward the light.
For beginners, this dense growth can feel surprisingly encouraging. Instead of caring for a single fragile plant, the entire tray grows together as a small ecosystem.
Flavor is another reason microgreens attract new growers. Even small harvests produce fresh greens that can be added to salads, sandwiches, or simple meals. The plants may be small, but their flavor can be surprisingly strong.
Because the plants are harvested early, their taste often feels concentrated and vibrant.
Growing food at home can also change the way people think about fresh ingredients. When greens grow just a few steps away in the kitchen, harvesting becomes part of daily life.
Many people who begin growing microgreens discover that the process becomes routine quickly. Starting a new tray every week keeps fresh greens available without requiring large gardens or complicated equipment.
For beginners who want to grow food indoors, microgreens provide an ideal starting point. The plants grow quickly, require minimal space, and deliver visible results in just a few days.
Over time, this simple process builds confidence. Once people see how easily microgreens grow, they often feel more comfortable experimenting with other plants as well.
If you are interested in understanding the full process behind growing microgreens indoors, this guide explains the details clearly.
👉 How to Grow Microgreens at Home
This page walks through the complete system and shows how to repeat the cycle consistently.

Common Mistakes That Slow Microgreens Down
Microgreens usually grow quickly and reliably. However, beginners sometimes experience slower growth or uneven trays. When this happens, the cause is often a small environmental issue rather than a major mistake.
Understanding these common problems helps new growers feel more confident as they learn to grow microgreens at home.
Most issues fall into a few predictable categories.
Overwatering the Tray
One of the most frequent mistakes beginners make is watering too often.
Because microgreens grow in shallow trays, moisture can remain in the growing medium longer than expected. Many new growers assume that more water will help the plants grow faster.
In reality, excess moisture can slow development.
When the growing medium becomes saturated, roots receive less oxygen. This can reduce healthy root growth and prevent the plants from developing strong stems.
Healthy microgreens usually grow best when the medium stays lightly moist rather than wet.
Observing the surface of the tray often provides a helpful clue. If the medium still looks damp, watering may not be necessary yet.
Weak or Inconsistent Light
Light plays a critical role once sprouts begin emerging.
Without consistent brightness, microgreens stretch toward the light source. The stems may grow tall but thin, and the leaves may remain small. This condition is often called “leggy” growth.
Indoor environments sometimes provide less light than people expect. Even bright rooms may not deliver the intensity plants receive outdoors.
Placing trays near a bright window usually improves growth. Some growers also use simple grow lights to maintain consistent light throughout the day.
When microgreens receive stable lighting, their stems grow stronger and their leaves expand more evenly.

Planting Seeds Too Densely
Microgreens grow close together, but extremely dense planting can slow growth.
When too many seeds occupy a small space, the young plants compete intensely for light and airflow. This competition may cause uneven growth across the tray.
Some areas may grow quickly while others struggle to develop.
Spacing seeds evenly across the surface usually helps create a more balanced tray. When seedlings have enough room to grow upright, the tray often fills with more uniform greens.
Poor Airflow
Microgreens grow in dense clusters, which makes airflow important.
Without some air movement, moisture can collect between stems. This environment may slow growth or cause plants to lean against each other.
Most homes already have enough airflow for small trays. However, placing trays in extremely enclosed spaces can create stagnant conditions.
Keeping trays in open areas where air circulates naturally often helps maintain healthier growth.
Expecting Instant Results
Although microgreens grow quickly, beginners sometimes expect visible changes within hours. When the tray looks the same after one day, it can feel like nothing is happening.
In reality, the early stages of growth occur below the surface.
Seeds absorb moisture and begin forming roots before any sprouts appear. Once the stems emerge, growth usually accelerates rapidly.
Understanding this early stage helps beginners remain patient during the first few days.
When these common issues are addressed, microgreens typically return to their natural fast growth cycle. Most trays begin filling with green shoots within a week.
For beginners, the key is simply observing the tray and adjusting small factors like light and moisture.
If you want a full explanation of how each stage works, this guide walks through the entire process in detail.
👉 How to Grow Microgreens at Home
Learning the full system often helps growers repeat the process successfully again and again.
Mini FAQ: Growing Microgreens at Home
Can you really grow microgreens at home in less than 10 days?
Yes. Many microgreens reach harvest stage within 7 to 10 days after planting. Fast varieties such as radish, broccoli, and mustard often grow especially quickly. Because microgreens are harvested very early in the plant’s life cycle, they develop much faster than traditional vegetables.
Do microgreens need sunlight to grow?
Microgreens need consistent light once the sprouts appear. Natural daylight from a nearby window often works well for small trays. Some indoor growers also use simple grow lights to provide steady brightness throughout the day.
What are the easiest microgreens to grow at home?
Several varieties grow reliably indoors and are popular with beginners. These include broccoli, radish, kale, mustard, and pea shoots. These plants germinate quickly and usually produce dense trays of greens within a week.
Can you grow microgreens in a small apartment?
Yes. Microgreens are ideal for apartments because they require very little space. A shallow tray placed on a windowsill or kitchen counter can support a full growing cycle. This compact setup allows many people to grow microgreens at home even without outdoor space.
In Short
Microgreens offer one of the fastest ways to grow fresh food indoors.
Instead of waiting months for harvest, many microgreens are ready within 10 days. Seeds sprout quickly, stems grow rapidly, and small leaves appear across the tray within the first week.
This short growth cycle makes microgreens ideal for beginners who want to see visible results quickly.
Because the plants remain small, they also require very little space. A shallow tray, consistent moisture, and steady light are often enough to support the entire process.
For people learning to grow microgreens at home, each tray becomes a simple growing cycle. Seeds are planted, sprouts appear, and fresh greens are harvested just days later.
Over time, repeating this cycle creates a steady supply of fresh greens indoors.
If you want to understand the complete process and how to repeat it consistently, the guide below explains every step clearly.
👉 How to Grow Microgreens at Home
This page walks through the full system and shows how beginners can build a reliable indoor growing routine.
Author: Aquager Editorial Team
Published: March 10, 2026
Last Updated: March 10, 2026


0 comments