
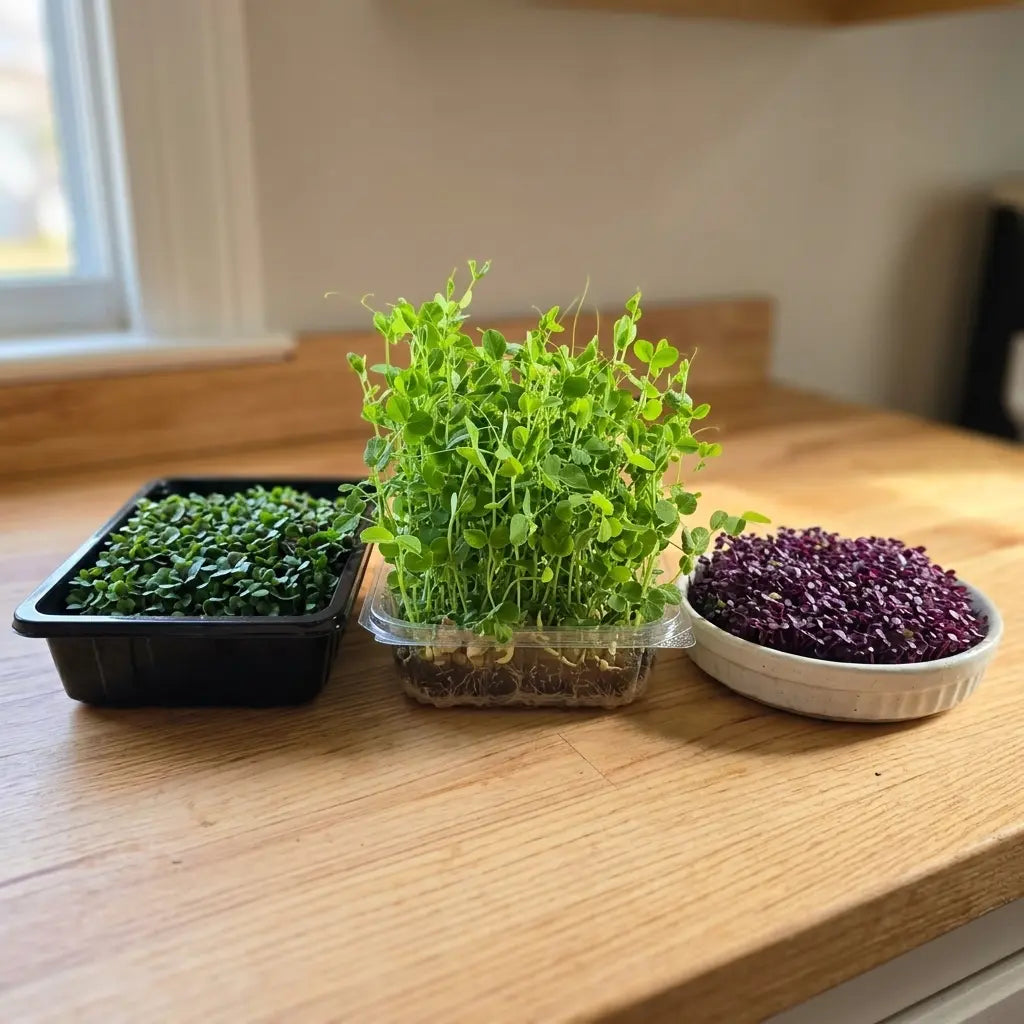
Search "best containers to grow microgreens" and you will get a dozen conflicting answers. Mason jars, cookie sheets, seed trays, yogurt cups, the internet says try anything with a flat bottom.
That advice works right up until your microgreens rot at the stem or dry out before they hit harvest height. Container choice affects drainage, airflow, and moisture, the three things that decide whether a tray of radish or pea shoots turns into dinner or a moldy mess. Most of the generic advice floating around skips this part entirely.
This guide ranks every container option that actually works, from purpose built trays to things already in your kitchen. You will also get the exact dimensions and materials to avoid so your next crop grows even and clean.
Why Container Choice Makes or Breaks Your Microgreens
Microgreens grow fast. Most varieties finish in 7 to 14 days, so there is little time for a growing setup to correct itself. A container that holds too much water suffocates the roots, and one that dries out too fast stunts growth before the true leaves even show up.
Airflow matters just as much as water. Tight, non breathable containers trap humidity around the stems, which is the biggest cause of the fuzzy white growth most beginners mistake for mold (it is usually just condensation feeding bacteria on wet stems).
Poor airflow also causes uneven growth. Seeds near a container's air-starved center often lag well behind the ones near the edges, which means half a tray is ready to harvest while the other half still needs another day or two.
Dark or opaque containers under grow lights also run warmer than clear or light colored ones, since they absorb more heat instead of reflecting it. That extra warmth raises mold risk even further, especially during the humid blackout period right after germination.
The right container solves all of this at once. It holds a shallow layer of growing medium, drains cleanly, and lets a little air move across the surface. If you are setting up your first tray, our guide on growing your first microgreens tray in 7 days covers the basics this article builds on.
What to Look For: Dimensions, Drainage Design, and Container Material
Before ranking specific containers, it helps to know what actually makes one work. A handful of factors decide whether a container helps or hurts a crop.
Depth. Microgreens have shallow root systems, so a container between 1.5 and 2.5 inches deep is ideal. Anything deeper wastes growing medium and holds excess water at the bottom, right where roots cannot use it.
Footprint. A wider, shallower container beats a narrow, deep one. More surface area means more seeds per batch and better light exposure once the greens stand up.
Drainage design. The best setups either have holes in the bottom paired with a solid catch tray underneath, or use a capillary mat that wicks water evenly without pooling. Either approach works. What does not work is a solid container with no way to manage excess moisture at all.
Container material. Food safe plastic is the standard for a reason: lightweight, non-reactive with nutrients, and durable through repeated watering. Rigid polypropylene, the kind used in most purpose built trays, resists staining and cracking far longer than the thin PET plastic that packaged produce comes in. Untreated wood, rusting metal, and thin single use containers all cause problems covered in the tier list below.
Stackability. If you are growing more than one tray at a time, containers that nest or stack save real counter space during the dark germination phase. A tray that wobbles or crushes under another tray's weight makes that first week harder than it needs to be.
Reusability. A container you will use for years is worth more than one you will toss after a single grow. Rigid, food safe plastic holds up to dozens of wash cycles, while thin disposable containers usually crack or warp within two or three grows.
Cleaning and Sanitizing Between Grows
Whatever container you land on, it needs to be washed between every grow, not just rinsed. Leftover root fragments and growing medium hold onto mold spores and bacteria that can carry straight into your next batch, even if the container looks clean.
A quick wash in hot, soapy water handles most of it. For a deeper clean, a diluted vinegar or 3 percent hydrogen peroxide rinse, followed by a full air dry, knocks out mold spores plain soap leaves behind. Let containers dry completely before the next planting, since starting a new tray on a damp surface undoes most of the benefit.
A tray like the Aquager Microgreens Tray is built around these numbers. At 10x20 inches and 2.5 inches deep, it hits the depth and footprint that most commercial growers use, which is why that size has become the industry standard rather than a marketing choice.
How Much Container Space You Actually Need
Container size should match how much you will realistically eat, not how much counter space you have.
- Single serving: A 5x5 inch container with about a tablespoon of seed is plenty for one person snacking over a week.
- Weekly household batch: A full 10x20 inch tray with 2 to 3 tablespoons of seed covers salads and toppings for two to four people.
- Market or bulk growing: Several stacked 10x20 trays on a shelving rack let you rotate a fresh tray every few days for a constant supply.
Starting smaller than you think you need is usually the better call. A single overgrown tray of radish or broccoli microgreens produces more than most households eat in a week, and a bigger container just means more that goes to waste before you get through it.
Container color plays a small role here too. Light colored or clear containers reflect more of a grow light's output back onto the seedlings, while dark containers absorb it as heat instead. Under a strong light source, that difference can be enough to speed up or slow down how evenly a tray fills in.
The Microgreens Growing Tray Tier List: What Actually Works
Not every container that holds soil is a good microgreens container. Here is how the common options actually rank, based on drainage, airflow, and how evenly they grow a crop.
- S-Tier: Purpose built 10x20 growing trays paired with a grow mat or a nesting drip tray.
- A-Tier: Repurposed produce clamshells and paper towel lined baking sheets.
- B-Tier: Wide mouth jars and deep casserole dishes, workable but limited.
- Skip it: Untreated wood, uncoated metal, cardboard, and unvented sealed containers.
S-Tier: Purpose-Built Growing Trays
Standard 10x20 inch growing trays are the gold standard for a reason. They are shallow, wide, stackable, and sized to match grow mats and germination domes built for the same footprint.
Paired with a solid nesting tray or a capillary grow mat, these trays give you full control over moisture without guesswork. Some growers instead use a perforated tray nested inside a solid one rather than a mat. Both approaches manage water the same way, giving excess moisture a controlled place to go instead of letting it pool against the roots.
This is the setup most microgreens farms use at scale, and it is just as easy to run on a kitchen counter. Once your greens are ready, our guide to harvesting microgreens without wasting your crop walks through the cutting technique that gets the most out of a tray like this.
A-Tier: Repurposed Kitchen Containers
Clean produce clamshells, like the kind lettuce or berries come in, make solid second tier containers. They already have built in drainage vents, decent depth, and a clear lid that works as a mini greenhouse during germination.
Rimmed baking sheets lined with a few layers of paper towel are another reliable option, especially for smaller batches. They lack built in drainage, so you will need to water carefully and check that the paper towel is not staying soggy.
Clean takeout containers with a few drainage slits cut into the bottom work in a pinch too, though the smaller footprint means smaller batches. Whatever you repurpose, make sure it is rated food safe and free of strong odors from previous use, since microgreens can pick up smells from porous plastic.
Compostable pulp and coco coir trays have also become more common. They perform close to A-tier for a single grow, since the material holds moisture evenly and breaks down cleanly afterward, but they soften with repeated watering and rarely survive a second or third use the way rigid plastic does.
B-Tier: Jars and Deep Dishes
Wide mouth jars work for sprouting pea shoots or sunflower using a soak and drain method, but they are a poor fit for soil based microgreens since there is no way to spread seeds in a single even layer. A mesh lid jar is a reasonable choice specifically for that soak and rinse method rather than a growing medium setup.
Deep casserole dishes have the opposite problem. Too much depth concentrates water at the bottom instead of near the roots, and the narrow walls limit airflow across the surface.
Skip These: Container Materials to Avoid
A few materials cause enough problems that they are not worth the risk. Untreated wood absorbs water, warps, and molds after just a few grows. Metal containers without a food safe coating can react with nutrients and rust from constant moisture.
Thin, single use containers not rated food safe can leach chemicals when they sit wet for a week straight, which matters more with microgreens since you eat the whole plant, stem included. Cardboard and other unlined paper containers fall apart within days once they are wet, and they cannot be sanitized between grows.
Tight, unvented containers with solid lids trap humidity so completely that mold can appear within 48 hours, even with a good growing medium underneath.
How to Add Drainage to a Container That Doesn't Have One
If you already have a container without drainage, you do not need to throw it out. A few small holes drilled or melted into the bottom, spaced about an inch apart, are usually enough for a shallow layer of growing medium.
Set the modified container inside a slightly larger tray or dish to catch runoff, and you have effectively built the same hole-and-catch-tray system purpose-built trays use. If drilling isn't an option, a thin layer of pebbles or a folded paper towel underneath the growing medium can help pull excess water away from the roots, though it is a less reliable fix than real drainage.

The Easiest Way to Get Container Sizing Right
If you would rather skip the trial and error, a purpose built system solves the sizing and drainage questions before you even plant a seed.
The Aquager Microgreens Tray Set comes as six 10x20 inch trays, the same footprint growers rely on for even germination and easy harvesting. These trays use a solid bottom instead of drainage holes, which sounds like a drawback until you pair one with an Aquager Grow Mat. The mat wicks water evenly from below, so the tray never needs to drain at all, no drip trays, no soggy counters.
Because the trays share one footprint, all six stack neatly during the dark germination period, then spread out under light once the seeds push through. That solves the stackability question covered earlier without needing a separate rack system for the first few days.
The mat itself holds up to several grows before it needs replacing, and it is compostable once it is finally done, so the setup does not add to the pile of disposable plastic most sprouting kits leave behind.
That combination solves the exact factors covered earlier: correct depth, a wide even footprint, and a drainage design that manages moisture without a single hole to clog or leak.
FAQ: Quick Answers on Microgreens Containers
Do microgreens need drainage holes?
No. Holes are one valid approach, but a solid tray paired with a capillary grow mat works just as well and is often less messy. What matters is that excess water has somewhere to go, whether that is out through a hole or wicked evenly through a mat, so roots never sit in stagnant water.
Can I reuse containers for microgreens?
Yes, as long as they are food safe and you wash them between grows. Leftover roots and growing medium can carry mold spores or bacteria into your next batch, so a quick rinse with hot soapy water between crops is worth the two minutes it takes. Skip reuse entirely for cardboard or paper based containers, since those cannot be sanitized properly no matter how well you scrub them.
What size container is best for beginners?
A standard 10x20 inch tray, 1.5 to 2.5 inches deep, is the easiest size to start with. It is large enough for a full meal's worth of microgreens but still fits on a kitchen counter or windowsill. If you are growing for just one person, a container half that size works fine too. For a full walkthrough of what to expect your first time, see our guide on what beginners need to know before growing microgreens indoors.
Can I grow microgreens without soil in a container?
Yes. Grow mats and other soilless mediums work in the same containers as soil and are often cleaner and easier for indoor growing, since there is no dirt to spill or compact over time. Just make sure whatever medium you choose is rated for consumption, since it stays in contact with the stems the entire grow.
How deep should a microgreens tray be?
Between 1.5 and 2.5 inches is ideal. Microgreens have short, shallow roots, so anything deeper just wastes growing medium and holds water where the roots cannot reach it. The exception is jars used for the soak and rinse method covered above, where airflow around the stems matters more than depth.
Conclusion: Pick the Right Container and Everything Else Gets Easier
Most microgreens problems trace back to the container, not the seeds. Soggy stems, patchy growth, and mold usually mean the setup did not manage water or airflow the way it needed to.
Getting this right also saves money over time. A container that grows an even, healthy tray on the first try beats replacing failed batches of seed and growing medium every time mold or rot wipes out a crop.
Once you match the depth, footprint, drainage design, and material to what microgreens actually need, growing gets a lot more forgiving. A shallow, food safe tray with a real plan for excess water will outperform anything improvised from the recycling bin.
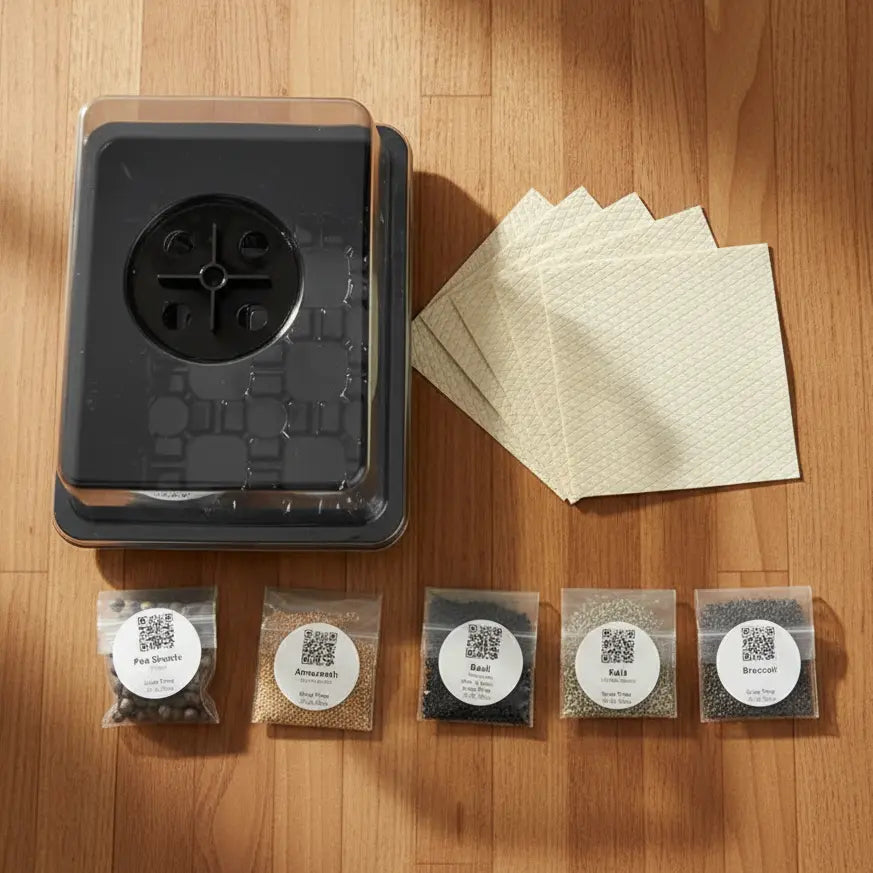
If you want the sizing and drainage questions solved from day one, the Aquager Microgreens Starter Kit bundles the right trays, a grow mat, and a dome into one setup built specifically for this.

Author: Aquager · Published: July 18, 2026 · Updated: July 18, 2026












0 comments