
A plant can look perfectly fine one week and be beyond saving the next, and in a hydroponic system, root rot is almost always the reason. It is the single most common cause of a sudden, unexplained plant death in an otherwise well-run setup.
What makes it so dangerous is speed and invisibility. Roots sit underwater, out of sight, and by the time the damage shows up in the leaves, the root system is often already badly compromised.
This guide covers what hydroponic root rot actually is, the four prevention pillars that stop it before it starts, the early warning signs worth watching for, and a treatment protocol that can save a plant if it is caught in time.
What Hydroponic Root Rot Actually Is
Root rot in hydroponics is almost always caused by Pythium, a water-loving pathogen that thrives in warm, low-oxygen, stagnant water and attacks root tissue directly.
Pythium is present in low levels in most environments and is not automatically a problem. It becomes destructive specifically when reservoir conditions, warm water, low dissolved oxygen, and organic debris, give it the opening it needs to multiply rapidly.
Once established, it spreads through a reservoir quickly, since every root sitting in the same shared water is exposed to the same pathogen at the same time, unlike soil where roots are more physically separated.
Pythium is the most common culprit, but it is not the only one. Fusarium and Phytophthora can cause similar-looking root rot under similar conditions, though the underlying prevention approach, controlling oxygen, temperature, and cleanliness, works against all of them, so identifying the exact pathogen matters less to a home grower than controlling the conditions that let any of them thrive.
Certain plants are more vulnerable than others. Fast-growing, thin-rooted herbs like basil and lettuce tend to show damage quickly once root rot starts, while sturdier, woodier-rooted plants like rosemary can sometimes tolerate a mild case slightly longer before visible symptoms appear.
Why Root Rot Is So Often Fatal
Healthy roots do two jobs at once: absorbing water and nutrients, and anchoring the plant. Root rot destroys the outer tissue responsible for absorption first, so a plant can be sitting in perfectly balanced, nutrient-rich water and still be unable to take any of it in.
The damage compounds quickly. A weakened root system absorbs less oxygen and nutrients, which further weakens the plant's ability to fight off the infection, creating a downward spiral that can go from first symptom to total plant loss within days rather than weeks.
This is exactly why prevention matters so much more than treatment in this specific case. A treatment protocol exists and can work, but it only works reliably if caught in the first day or two, before the damage cascades too far.
Root Rot Versus Other Root Problems
Not every unhappy-looking root system is root rot, and confusing it with a different problem leads to the wrong fix.
Transplant shock produces temporary wilting and slowed growth right after a plant is moved or disturbed, but the roots themselves stay firm and pale, not slimy or discolored, and the plant typically recovers within a few days on its own.
Nutrient burn from an overly concentrated solution can cause root tip browning, but it tends to affect root tips evenly rather than producing the soft, slimy, foul-smelling texture that specifically marks an active infection.
The clearest distinguishing test is texture and smell together. Firm roots with no odor point away from root rot, even if the plant looks stressed for another reason.
The Four Prevention Pillars
Preventing root rot comes down to controlling the conditions Pythium needs to thrive, rather than trying to eliminate the pathogen entirely, which is not realistically possible in an open reservoir system.
Think of it less as fighting an enemy and more as removing its opportunity. A reservoir that stays cool, well-oxygenated, correctly balanced, and clean simply never gives the pathogen the foothold it needs, regardless of how much of it happens to be present at trace levels.
Pillar One: Dissolved Oxygen
Low-oxygen water is the single biggest factor that lets Pythium take hold. Roots sitting in stagnant, oxygen-poor water are already stressed before the pathogen even shows up, making them far more vulnerable.
An Aquager Air Pump paired with an Air Stone keeps the reservoir continuously oxygenated, which is the single most effective prevention step available to a home grower.
Running the air pump continuously, rather than on a timer, is worth the small amount of extra electricity it uses. Even a few hours a day without aeration gives dissolved oxygen a chance to drop back into the range that favors pathogen growth.
Pillar Two: Water Temperature
Pythium thrives fastest in warm water, generally above 75 degrees Fahrenheit, while dissolved oxygen naturally decreases as water warms, compounding both risk factors at once.
Keeping a reservoir out of direct sunlight and away from heat-generating equipment like a nearby appliance keeps the water in a cooler, lower-risk range without needing dedicated cooling equipment for most home setups.
A kitchen counter near a window can warm up noticeably on a sunny afternoon even if the room itself feels comfortable, so checking reservoir temperature occasionally during warmer months catches a slow creep upward before it becomes a real risk factor.
Pillar Three: pH and Nutrient Balance
A plant under nutrient or pH stress has weaker natural defenses, similar to how a person run down and undernourished catches illness more easily.
Keeping pH in the correct range and nutrient concentration appropriate for the plant's growth stage keeps roots strong and better able to resist the pathogen even when it is present in the water at low levels.
Pillar Four: Cleanliness and Light-Blocking
Light reaching the reservoir water encourages algae growth, and algae provides organic material that helps pathogens like Pythium establish and spread more easily.
Light-blocking net pot covers and a reservoir kept clean of decaying plant debris between refills both reduce the organic material available to feed a developing problem before it starts.
A full reservoir change every one to two weeks, rather than only topping off with water, removes accumulated organic matter and any pathogen buildup along with it, functioning as a routine reset rather than waiting for a problem to develop.

Early Warning Signs of Root Rot
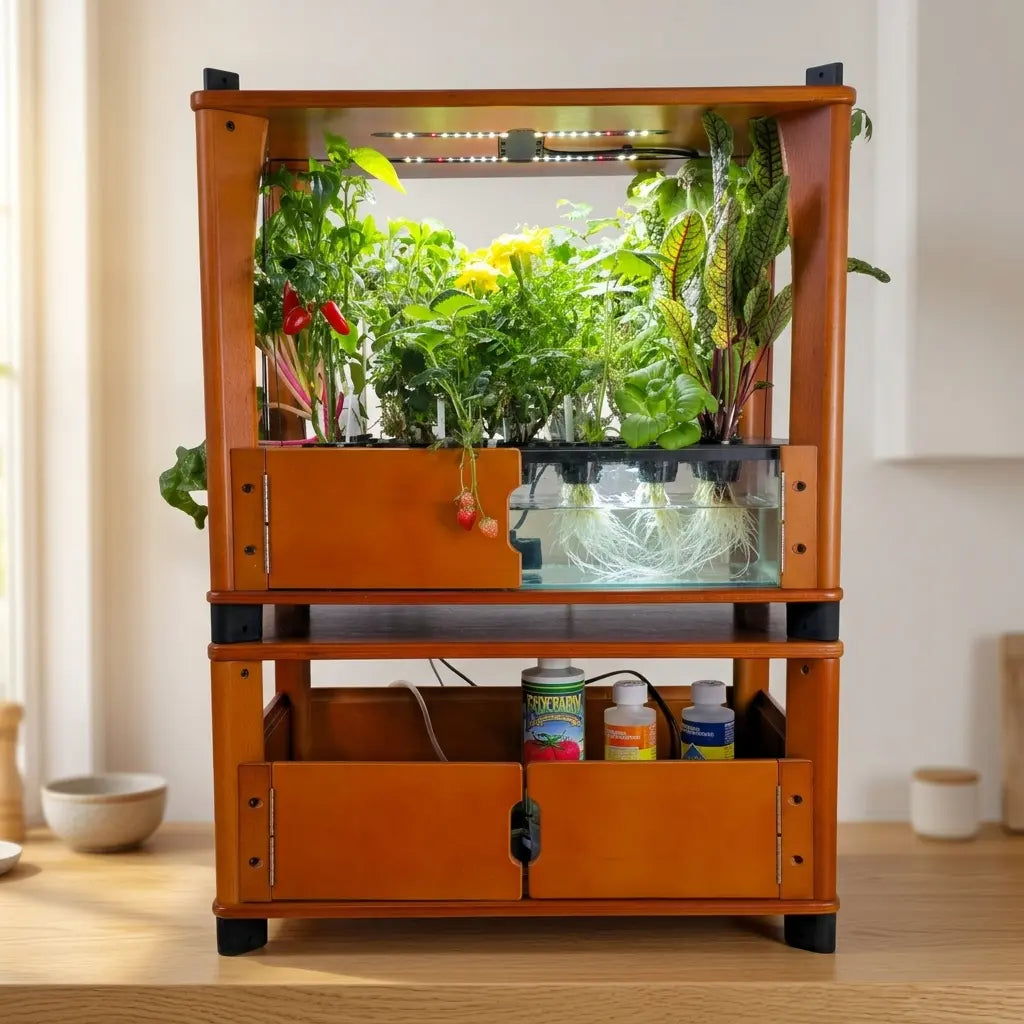
Healthy hydroponic roots are white or pale tan and firm to the touch. The earliest sign of trouble is roots turning brown or gray and developing a slimy texture rather than staying firm.
A distinct sour, musty odor from the reservoir water is another early indicator, often noticeable before any visible root discoloration is easy to spot without pulling the plant to look closely.
Above the waterline, wilting despite adequate water, yellowing lower leaves, and stalled growth are the visible symptoms, though by the time these show up, root damage is often already underway.
Checking the roots directly, rather than waiting for above-water symptoms, is the more reliable early-detection habit. A quick look each time the reservoir is refilled costs almost no extra time and catches a developing problem well before the plant itself shows visible distress.
Treatment Protocol If Caught Early
If root rot is caught in its earliest stage, brown or slimy patches on otherwise healthy-looking roots, quick action gives a real chance of saving the plant.
Remove the plant from the reservoir and gently rinse the root ball under cool, clean water to remove as much of the slime and debris as possible.
Using clean, sanitized pruning shears, trim away any roots that are clearly brown, mushy, or slimy, cutting back into firm, white tissue. It is better to remove slightly too much than to leave any infected tissue behind.
A diluted hydrogen peroxide solution, roughly one part standard 3 percent H2O2 to four parts water, can be used to rinse the trimmed roots, since hydrogen peroxide breaks down into water and oxygen and helps kill remaining pathogen on contact without leaving a lasting residue.
Fully drain, clean, and disinfect the reservoir itself before returning the plant to fresh water and nutrients, since returning a treated plant to the same contaminated water undoes the entire treatment effort.
A brief soak of the empty reservoir in a diluted bleach solution, roughly one tablespoon per gallon of water, followed by a thorough rinse, is enough to address any pathogen that lingers on the plastic or growing medium surfaces themselves. Skipping this step and simply refilling with fresh water leaves the reservoir walls as a potential reinfection source.
Increase aeration immediately after treatment. This is the point where an air pump and air stone matter most, since a recovering root system needs all the dissolved oxygen it can get while it regrows the tissue that was lost.
Watch the plant closely for the next several days rather than assuming treatment automatically worked. New white root growth emerging from the trimmed area is the clearest sign of recovery, while continued browning or a returning odor means the infection was not fully addressed and the process needs repeating.
A weakened, recently treated plant benefits from a slightly reduced nutrient concentration for the first week or two after treatment, since a stressed, partially damaged root system cannot process a full-strength solution as efficiently as a healthy one.
If more than half the root mass had to be removed during trimming, treat the outcome as genuinely uncertain rather than assuming recovery is guaranteed. In cases that severe, taking a healthy cutting from the plant, if the variety allows it, is a reasonable backup plan alongside the treatment itself.
Common Root Rot Mistakes
Skipping aeration entirely because a system seems to be working fine is the most common mistake, since low oxygen is a silent risk factor that does not show symptoms until a problem is already established.
Waiting too long to act once slime or odor is first noticed is another frequent error, given how quickly root rot compounds once it takes hold in a shared reservoir.
Returning a treated plant to the original, unclean reservoir water is a subtler mistake that undoes an otherwise correct treatment, since the pathogen simply reinfects the freshly trimmed roots.
Overwatering or keeping growing medium constantly saturated without adequate oxygen exchange creates the same low-oxygen conditions root rot depends on, even outside a fully submerged reservoir setup.
Treating the symptom without addressing the underlying condition is a final common mistake. Trimming rotted roots and returning a plant to the same warm, low-oxygen, uncleaned reservoir it developed the problem in almost guarantees a recurrence within a short time.
Root Rot FAQ
What causes root rot in hydroponics?
Most often Pythium, a pathogen that thrives in warm, low-oxygen, stagnant water and attacks root tissue directly once conditions favor it.
Can a plant recover from root rot?
Yes, if caught early. Trimming infected roots, treating with a diluted hydrogen peroxide rinse, and returning the plant to a clean, well-oxygenated reservoir gives a real chance of recovery.
What does hydroponic root rot look like?
Roots turn brown or gray and become slimy rather than firm and white, often accompanied by a sour or musty smell from the reservoir water.
How much hydrogen peroxide do I use to treat root rot?
A diluted rinse of roughly one part standard 3 percent H2O2 to four parts water is a commonly used ratio for treating trimmed roots.
What is the single best way to prevent root rot?
Keeping the reservoir consistently oxygenated with an air pump and air stone addresses the biggest single risk factor, since low-oxygen water is what allows Pythium to establish itself in the first place.
How can I tell root rot apart from transplant shock?
Transplant shock leaves roots firm and pale with no odor, and the plant typically recovers within days. Root rot produces soft, slimy, discolored roots along with a sour or musty smell.
Is root rot contagious to other plants in the same reservoir?
Yes. Since every plant shares the same water, an active infection can spread to other roots in the same reservoir, which is why a full reservoir change is part of any treatment, not just an optional step.
How often should I check my roots for signs of rot?
A quick visual check every time you refill the reservoir is enough for most home setups, since this is also when you are already handling the plant and water directly.
Protecting Your Roots Before It Starts
Root rot is fast and often fatal specifically because it happens out of sight, which makes prevention far more reliable than treatment as a strategy.
Consistent oxygenation, cool water temperature, correct pH and nutrient balance, and a clean, light-blocked reservoir together cover nearly every condition Pythium needs to become a real problem.
None of the four pillars requires constant attention on their own. Aeration runs continuously once set up, temperature just means keeping the reservoir out of direct heat, pH and nutrients get checked at each refill, and cleanliness comes down to a full reservoir change every one to two weeks. Together they add up to a small amount of regular maintenance that prevents the one problem capable of killing a plant in days rather than weeks.
For more on why oxygen matters so much to hydroponic roots in general, our piece on why plant roots need oxygen in hydroponics goes deeper into the science behind this prevention pillar, and our beginner's guide to setting up hydroponics covers building a system with these conditions in mind from day one.
If pests rather than pathogens are your current concern, our guide to fungus gnats in indoor plants covers a different but related indoor growing problem worth knowing about.

A reservoir that stays oxygenated, cool, balanced, and clean rarely gives root rot the opening it needs, which means the best treatment protocol is usually the one you never have to use.
Author: Aquager · Published: July 6, 2026 · Updated: July 6, 2026












0 comments