If the word “hydroponics” makes you picture a complicated laboratory setup with pipes, pumps, and a horticulture degree on the wall — you’re not alone. It’s one of the most intimidating words in indoor growing, and it stops a lot of people before they even start.
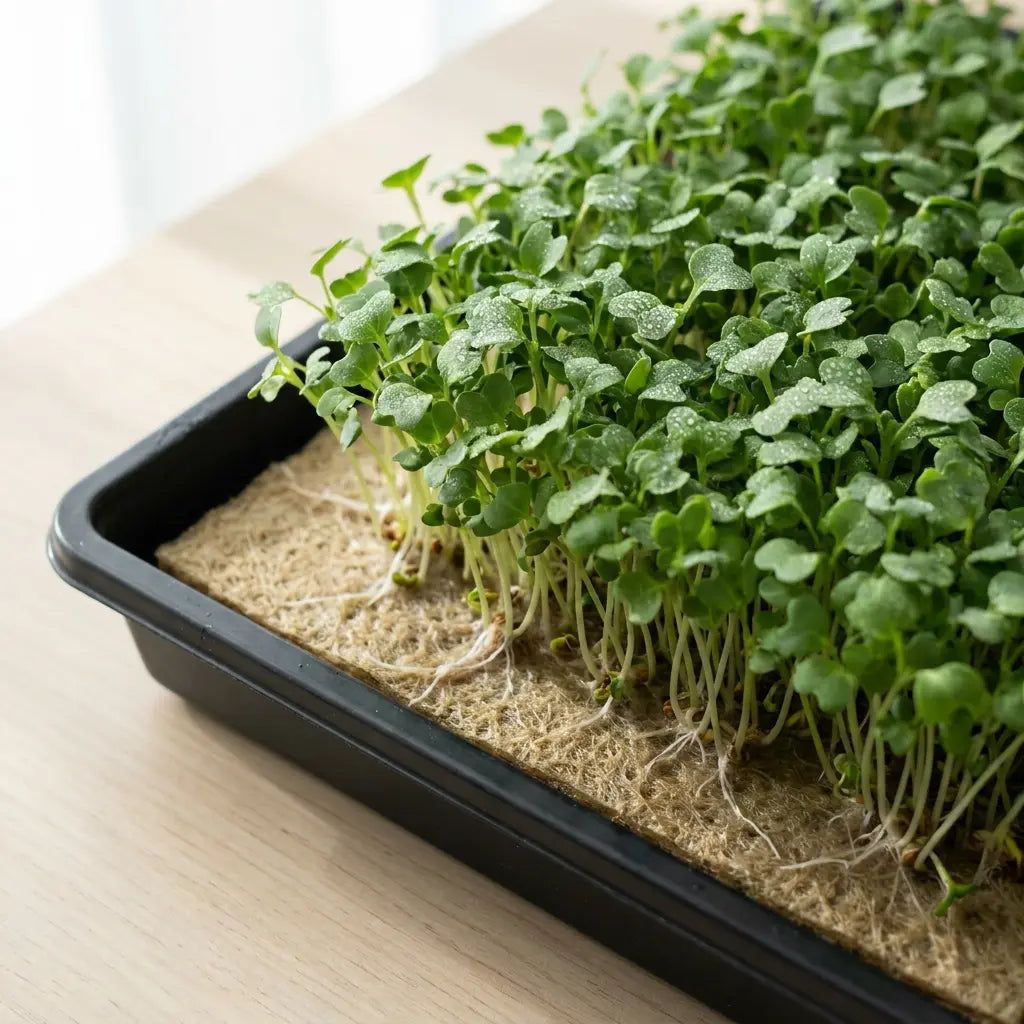
Here’s what no one tells you: the grow mat sitting at the bottom of a microgreens tray is a hydroponic medium. That’s it. That’s the whole system. There’s no pump, no reservoir, no timer, no nutrient solution — just a coconut fiber pad, some seeds, and water. If you’ve ever grown microgreens on a grow mat, you’ve already done hydroponic farming.
The goal of this post is to show you exactly how it works, why it’s actually simpler than growing in soil, and how to set up your first hydroponic microgreens tray in five steps.
What “Hydroponic Farming” Actually Means for Microgreens
Hydroponics is any method of growing plants without soil. The roots get their support and moisture from something other than dirt — in commercial setups, that might be water, clay pebbles, or rockwool. For microgreens at home, it’s an organic grow mat made from compressed coconut coir (coco fiber).
That’s the whole demystification. Coco coir is just the fibrous husk of a coconut. It holds water exceptionally well, gives roots something to anchor into, and creates the right air-to-moisture balance for germination. It’s been used in agriculture for decades and is one of the cleanest, most sustainable growing substrates available.
When you place a grow mat in a tray, add seeds, and keep it moist, you’ve built a complete hydroponic farming setup. There’s nothing complicated hiding behind the terminology.
The reason this matters: hydroponic farming produces microgreens that are cleaner, faster, and more consistent than soil-grown alternatives. No pests hiding in the dirt. No weeds. No soil-borne fungus. Just seeds, coir fiber, water, and a few days.
Grow Mat vs. Soil: An Honest Comparison
Most beginners default to soil because it’s familiar. But for indoor microgreens specifically, soil comes with a set of problems that a grow mat eliminates entirely.
Fungus gnats. These tiny flies live in moist potting soil and reproduce rapidly indoors. They’re one of the most common frustrations in indoor gardening, and they’re essentially nonexistent when you grow on a coir mat — there’s no decaying organic matter to attract them. The guide to plant bugs indoors covers exactly why this happens and how soil conditions drive it.
Inconsistent moisture. Soil holds water unevenly. Dry pockets form, wet spots compact. Coir fiber is engineered to distribute moisture uniformly — every seed gets the same conditions, which produces more even germination and a more consistent harvest.
Mess and cleanup. Soil in a kitchen or apartment is inherently messier to work with. Grow mats are clean, contained, and compostable — toss the spent mat when you’re done and start fresh.
Slower germination. Seeds in dense soil can struggle to push through. In the open, airy structure of a coir mat, germination is faster and more reliable — a meaningful difference when you’re harvesting in 7–10 days.
The one thing soil has going for it: it’s cheap and available anywhere. But for indoor microgreens — a crop specifically designed for speed, cleanliness, and repeat growing — a grow mat outperforms soil on every metric that matters in a home kitchen.
How to Set Up Hydroponic Microgreens in 5 Steps
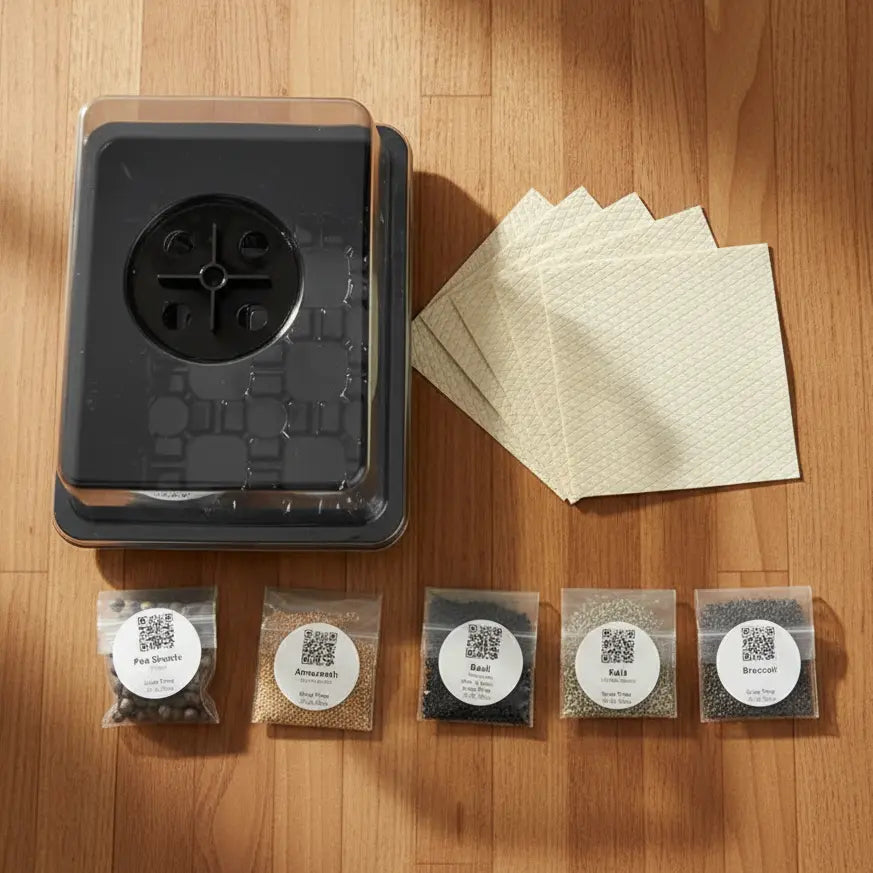
This microgreens setup takes about ten minutes. You’ll need seeds, a grow mat, a tray, a humidity dome, and water. The Microgreens Starter Kit includes the tray, dome, and a grow mat together — everything except the seeds — and is the fastest way to get your first hydroponic microgreens setup ready.
If you already have equipment and just need more mats, the Microgreens Grow Mat (5-pack) is the grow medium on its own at $9.99 for five mats — enough for five full harvests.
Step 1: Soak the Grow Mat
Place your dry coir mat in the tray and add just enough water to saturate it — you’re aiming for moist, not waterlogged. The mat will absorb the water and expand slightly. Let it sit for a minute until it’s fully hydrated, then drain off any standing water. The mat should feel heavy and damp, not squishy or pooling.
Step 2: Spread the Seeds
Distribute your seeds evenly across the entire surface of the mat. You’re aiming for a dense, single-layer coverage — seeds touching but not piled on top of each other. Dense seeding is one of the things that surprises beginners: microgreens are grown much more tightly than garden vegetables. This density is what drives the rapid, lush growth you see in photos.
For your first grow, radish and sunflower are particularly forgiving — both germinate fast and produce satisfying results. Broccoli and arugula are also beginner-friendly. Check the microgreens for beginners guide for a full variety overview.
Step 3: Cover and Stack
Place a second tray upside down over the seeds as a blackout cover, or use the humidity dome. Some growers add a small weight on top to ensure good seed-to-mat contact — this improves germination rates by preventing seeds from drying out at the edges. Leave this cover in place for the first 2–3 days.
During this blackout phase, check once daily to mist the seeds lightly if they look dry. The goal is to keep them moist and in darkness while germination begins.
Step 4: Uncover and Water Daily
Once sprouts are pushing upward — typically around day 3 — remove the cover and move the tray to your light source. A south-facing windowsill works well; a simple grow light works even better. Indirect natural light is enough for most varieties.
From this point, water by bottom-watering: add a small amount of water directly to the tray (not onto the plants themselves) and let the mat absorb it from below. This keeps the foliage dry and prevents mold. Misting is fine for very young sprouts, but once leaves open, bottom-watering is cleaner.
Step 5: Harvest
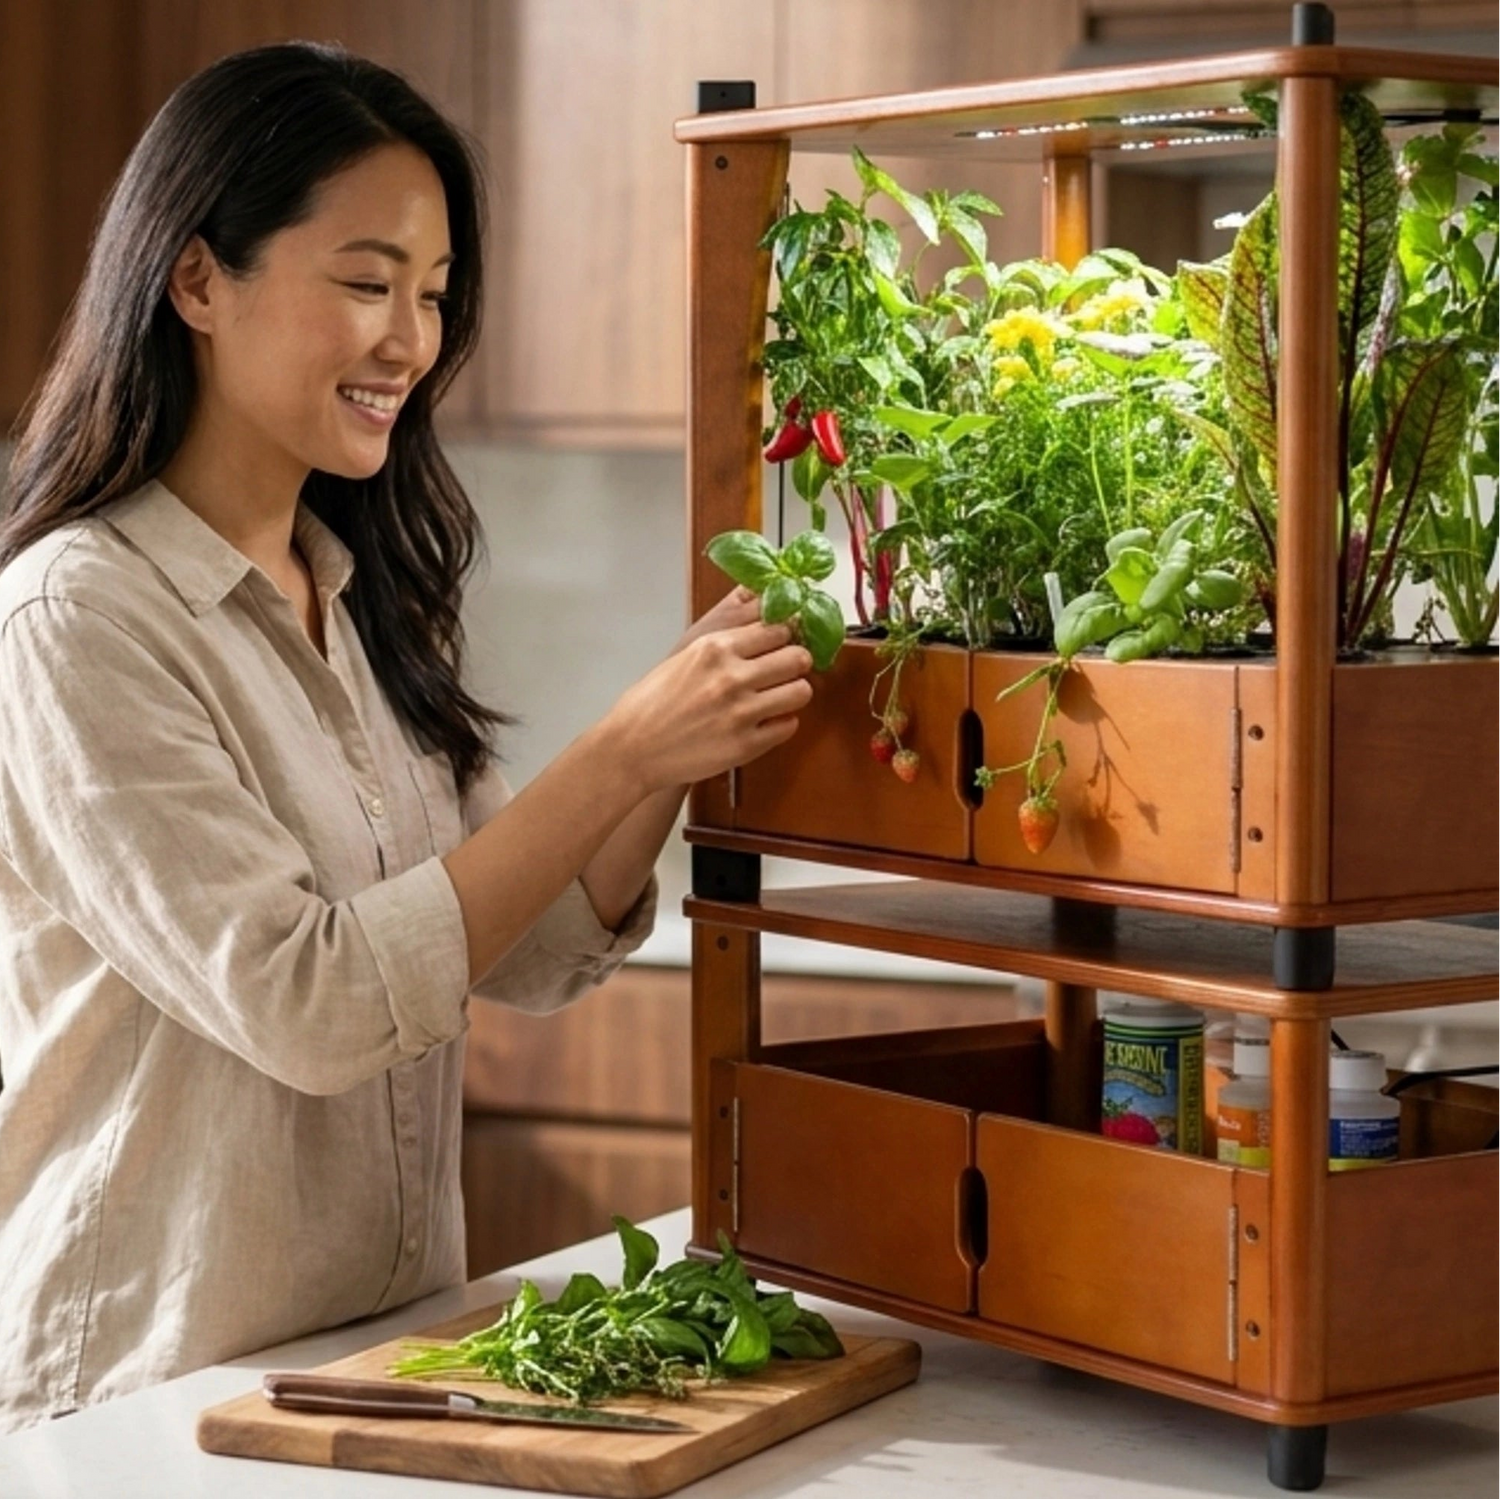
Most microgreens are ready between day 7 and day 10, when the first true leaves open. Harvest by cutting just above the mat with clean scissors. Cut the whole tray at once and use immediately — microgreens lose flavor and nutrition quickly after harvest, which is why fresh-grown always tastes better than store-bought.
After harvest, roll up the spent mat (roots and all) and compost it. Rinse the tray, add a fresh mat, and start again.
The Hero Product: Aquager Microgreens Grow Mat
The grow mat is the single most important piece of your hydroponic microgreens setup — and it’s also the most underappreciated. Most beginners focus on seed selection, but the medium you grow in determines germination speed, moisture consistency, and final harvest density more than almost anything else.
The Aquager Microgreens Grow Mat is made from compressed organic coconut coir — the same material used in commercial hydroponic operations, sized for the standard 10×20” microgreens tray. Each mat is pre-cut and ready to drop into your tray with no trimming, no prep, and no mess.
What sets it apart from improvised alternatives like paper towels, burlap, or loose soil:
- Water retention without saturation. The coir fiber structure holds moisture evenly while maintaining airflow to the roots — the balance that drives fast, even germination.
- Sterile and neutral. No added fertilizers, no pesticide residues, no hidden biology that can go wrong. Exactly what you want for a crop you’re eating raw within the week.
- Fully compostable. Post-harvest, the mat and attached roots go straight into compost. No plastic waste, no soil disposal issues.
- Consistent harvest after harvest. Because the mat’s properties don’t vary between batches, your results become predictable — same setup, same outcome, every time.
The five-pack at $9.99 gives you five full growing cycles. At that price, home-grown hydroponic microgreens cost a fraction of what you’d pay at a farmers market — and taste better because they go from tray to plate in minutes rather than days.
For a complete first-time setup with the mat already included, the Microgreens Starter Kit ($24.99) bundles the tray, humidity dome, and a grow mat into a single package. If you’re ready to scale or grow multiple trays at once, the Microgreens Tray Set of 6 ($39.99) gives you six standard trays for continuous rotation.
Frequently Asked Questions
Do microgreens grown on a mat need fertilizer?
No. Microgreens are harvested before they deplete the nutrients stored in the seed itself. The mat provides structure and moisture — the seed provides everything else. This is one of the reasons hydroponic farming is so clean and simple at the microgreens scale: no nutrients to mix, measure, or manage.
Can any seeds be grown on a grow mat?
Most small to medium microgreens seeds work well on coir mats — radish, broccoli, arugula, sunflower, kale, mustard, peas, and more. Very large seeds like corn or beans don’t suit the format. Mucilaginous seeds (like basil or chia) need slightly adjusted technique — soak first, then spread without extra water. For a look at the easiest varieties to start with, the how to grow microgreens at home guide covers setup and variety selection in full detail.
How wet should the mat be?
Saturated but not swimming. The mat should feel heavy and uniformly damp when you squeeze it — you shouldn’t be able to wring water out of it, but it also shouldn’t have standing water underneath. When in doubt, err on the drier side: overwatering is more likely to cause mold than underwatering.
Is coco coir the same as coconut fiber?
Yes — coir, coco coir, coco fiber, and coconut fiber all refer to the same material: the fibrous husk layer between the outer shell and the coconut. It’s a byproduct of the coconut industry and one of the most sustainable growing substrates available. No additional growing is required to produce it.
Can I reuse the mat?
The mat is designed for a single grow cycle. Once you harvest, the root system is woven throughout the mat and pulling them apart would damage the fiber structure. The good news is that the spent mat composts quickly and completely — roll it up, add it to your compost or green bin, and drop a fresh mat in for the next tray.
How is this different from the microgreens I see at the grocery store?
Grocery store microgreens are typically grown in soil at commercial scale, harvested, packaged, refrigerated, and shipped — all before they reach the shelf. By the time you eat them, they’ve been harvested anywhere from two days to a week prior. Flavor and nutrition decline steadily from the moment of harvest. Home-grown hydroponic microgreens go from tray to plate in minutes. The difference in flavor is immediately obvious.
Your First Hydroponic Microgreens Setup Starts With One Mat
Hydroponic farming, at the microgreens scale, requires no pumps, no timers, no nutrient solutions, and no specialized knowledge. It’s a coconut fiber mat, some seeds, water, and five minutes of setup. Everything else is waiting.
The Microgreens Grow Mat (5-pack) gives you five harvests worth of clean, sterile growing medium for $9.99. If you’re starting from scratch and want the complete setup in one order, the Microgreens Starter Kit includes the tray, dome, and mat together — just add seeds and water.
The terminology was the only thing that ever made this seem complicated. Now that you know what’s actually inside the tray, there’s nothing left to figure out.
Author: Aquager · Published: May 27, 2026 · Updated: May 27, 2026


0 comments