The white fuzz on your microgreens is probably not mold.
Read that again, because it’s the thing this post exists to say. Most beginner growers see the fine white fuzz that develops around the base of their stems during the germination and early growth phase and immediately assume they’ve failed. They haven’t. What they’re seeing in most cases is root hairs — a completely normal, healthy part of plant growth that indicates the seedlings are actively seeking moisture and nutrients.
Actual mold looks different, smells different, and is caused by specific, fixable conditions. This post covers how to tell the difference, what actually causes mold in microgreens, and three structural changes that prevent it from happening. If you’re reading this in a panic, start with the identification section. If you’re reading this preventively, start with the root causes.
Root Hairs vs. Mold: How to Tell the Difference
Root hairs are microscopic hair-like extensions that grow from the outer cells of plant roots. They dramatically increase surface area for water and nutrient absorption. They appear as a uniform white fuzz clustered around the lower stem and the surface of the growing medium.
Root hairs have specific visual characteristics:
- Uniform distribution — they appear consistently across all stems, not in isolated patches
- Attached to stems — they grow directly from the stem surface, especially near the base
- Fine and hair-like — delicate, individual strands rather than clumped fuzzy masses
- Disappear when blown — a gentle breath disperses them; they reattach as growth continues
- No odor — root hairs have no smell whatsoever
Mold is fungal growth and has a distinctly different profile:
- Irregular distribution — appears in patches, often where moisture accumulated unevenly
- On the medium or plant surface — often grows on the grow mat surface, on dead seeds, or on wet stem sections independent of normal root growth
- Cottony or powdery texture — clumped and irregular rather than hair-like
- Musty smell — the definitive test: genuine mold has a detectable, earthy, musty odor. If you lift the tray and smell nothing unusual, it’s almost certainly root hairs.
- Color — mold is often gray-green, blue-gray, or black. Pure white fuzz with no odor is root hairs.
The smell test is the fastest and most reliable diagnostic. Pick up your tray, lift the dome, and take a deliberate sniff near the mat surface. Root hairs: no smell. Mold: unmistakable musty odor. If you’re still unsure, look for the irregular patchy distribution that characterizes fungal growth versus the uniform coverage of root hairs.
If you’ve confirmed it’s root hairs: do nothing. Your tray is healthy. Continue your normal growing process.
The Three Root Causes of Microgreens Mold
Almost every case of microgreens mold traces back to one of three causes — often in combination. Fix the cause, not just the symptom.
Cause 1: Overwatering (the Most Common Culprit)
Overwatering is responsible for the majority of microgreens mold cases. Mold is a fungus, and fungi require two things above all others: organic matter and moisture. Microgreens provide plenty of organic matter. When you add excess moisture that can’t drain or evaporate, you’ve created the ideal fungal growth environment.
The fix: bottom watering only, and only when needed.
Bottom watering means pouring water directly into the solid-bottom tray beneath the growing tray — never misting or watering from above after germination. The grow mat wicks moisture upward from below through capillary action. This keeps the upper surface of the mat at the right moisture level without creating the wet surface conditions that mold needs.
After the germination phase, check the mat moisture by gently pressing a corner. If it still feels damp, don’t add water yet. Most trays need bottom watering once every 12–24 hours after the germination phase — sometimes less in humid summer weather. When in doubt, wait.
Never mist your microgreens after the germination phase. Misting wets the stem surface and creates exactly the microclimate that favors mold. If you’ve been misting, stop immediately and switch to bottom watering only.
Cause 2: Poor Airflow
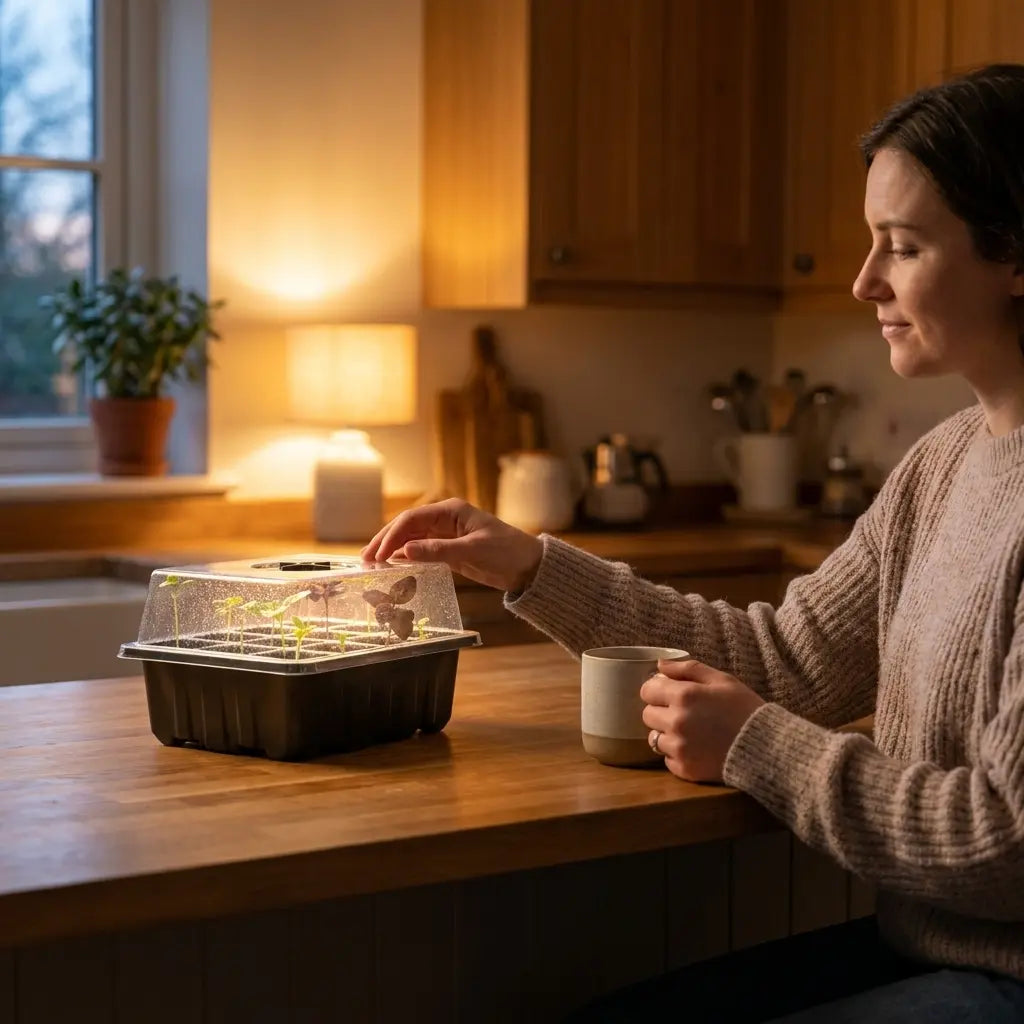
Stagnant, humid air is the second major mold contributor. In the germination phase, you need the dome on to maintain humidity. But once seedlings are up and you’ve moved to the light phase, the dome should come off entirely.
Leaving the dome on after germination is a very common beginner mistake. The enclosed microclimate under a dome — warm, humid, still — is ideal for mold. Once stems are 1 inch or taller and clearly germinated, remove the dome permanently.
To improve airflow: remove the dome completely after germination, give your tray space, and in high-humidity rooms (basement, enclosed shelf), a small fan running nearby for a few hours per day significantly reduces mold risk. Even elevating the growing tray slightly allows some air circulation under the mat.
Cause 3: Contaminated Growing Medium
Loose potting soil carries dormant fungal spores, organic matter in various stages of decomposition, and fertilizer residues — all of which can accelerate mold growth in the dense, humid environment of a microgreens tray.
Coco coir grow mats are significantly less prone to mold: they’re manufactured under conditions that minimize fungal contamination, they distribute moisture evenly without pooling, and their fiber structure provides better drainage than loose soil. Paper towels stay too wet and don’t drain adequately — the highest-mold-risk growing medium for microgreens. If you’ve been growing on paper towels and getting mold, switching to a grow mat is the single biggest improvement you can make.
Mold Emergency Checklist
If you see white fuzz:
- Smell the tray — musty smell = mold; no smell = root hairs (stop here, you’re fine)
- Look for patchy irregular distribution — isolated patches = mold; uniform coverage = root hairs
- Check the color — gray/green = mold; pure white = root hairs
If confirmed mold:
- Remove the dome immediately if still on
- Increase airflow — move tray to a better-ventilated spot or turn on a fan
- Let the mat dry slightly — skip one bottom watering cycle
- Check for standing water in the bottom tray — pour it out if present
- If mold is minor (small patch, caught early): continue with improved airflow and less watering
- If mold is extensive (covers more than 20% of the mat surface): discard tray, sterilize with diluted hydrogen peroxide (1 part H₂O₂ to 5 parts water), start fresh
For your next tray (prevention):
- Use a grow mat instead of soil or paper towels
- Bottom-water only — no misting after germination
- Remove dome at germination (day 2–3), not later
- Give the tray good air circulation
- In summer: water less frequently than you think you need to
Why the Grow Mat Prevents Mold Structurally
The Microgreens Grow Mat isn’t just a convenience product — it’s a structural mold prevention tool.
Even moisture distribution. Coco coir fibers wick water consistently through capillary action, spreading moisture evenly through the mat rather than pooling in any one area. The absence of wet spots eliminates the localized humid zones where mold initiates.
Controlled surface moisture. The mat’s structure keeps the upper surface at a lower moisture level than the interior — roots grow into a moist interior while the stem surface remains relatively dry. Mold grows on wet surfaces; the grow mat keeps those surfaces drier.
No decomposing organic material. Loose soil contains decaying organic matter that feeds fungal growth independently of the microgreens. Coco coir is inert from a fungal food source perspective — mold has nothing to eat that isn’t the microgreens themselves, which are healthy and growing rapidly.
Biodegradable and disposable. Each grow mat is used once and composted after harvest. There’s no accumulated fungal population from previous grows, no contamination from prior tray failures, no rehydrating dormant spores. Fresh mat, fresh start, every time.
Summer Mold Risk: What Changes in June–September
Summer is peak mold season for microgreens. In most US locations, relative humidity climbs to 60–80% from June through September. This means evaporation from the mat surface slows, and the overall microclimate around your tray becomes more mold-favorable. Warmer temperatures also accelerate mold growth rate — a minor mold initiation that would take several days to become visible in winter can become a problem in 24–36 hours in summer.
Practical summer adjustments:
- Water less frequently — check mat moisture before watering rather than watering on a fixed schedule
- Prioritize airflow more aggressively — a fan or open window near the tray makes a significant difference
- Harvest on time — don’t leave mature microgreens sitting in the tray for extra days; once ready, harvest and refrigerate
- Consider faster-maturing varieties in summer (radish, mustard at 5–7 days) rather than slower crops (cilantro at 10–14 days)
Our radish growing guide covers the full bottom-watering technique in detail — it’s the best first tray for any new grower in June through September.
Neem Oil: For Pests, Not Mold
A note on neem oil, since it appears in many mold-related searches. Neem Oil Spray is primarily an insecticide and antifungal treatment for established plants — it’s effective against fungus gnats and fungal diseases like powdery mildew on mature plants. It’s not the first-line treatment for microgreens mold during the growing phase because you don’t want to spray a treatment on food you’re about to eat, even an organic one.
Neem oil spray is genuinely useful if you’re dealing with fungus gnats (a common summer companion to mold-favorable conditions) or as a preventive treatment on a new mat if you’ve had persistent mold issues. For most mold situations, fixing the watering and airflow is sufficient.
Frequently Asked Questions
Is it safe to eat microgreens that had root hairs (white fuzz)?
Yes — completely. Root hairs are a normal part of plant physiology. The microgreens are healthy and safe. Rinse before eating as you would any fresh produce.
Can I save a tray that has real mold?
Sometimes. If mold is caught early and affects only a small area (less than 20% of the mat surface), improving airflow and reducing watering can stop its spread. Cut away any visibly moldy stems immediately. If mold has spread widely or reached the edible portion of the crop, discard the tray.
Why do radish microgreens seem to get more root hairs than other varieties?
Radish and other Brassica-family microgreens develop particularly visible root hairs because of their rapid germination rate. This often concerns beginners, but it’s a sign of vigorous, healthy growth — not a problem. Our radish growing guide covers what to expect at each stage.
Does mold make microgreens toxic?
Mold on microgreens typically involves common environmental fungi rather than highly toxic varieties. That said, moldy food should not be eaten. If you’re uncertain whether your crop is safe, discard it and start fresh — seeds and grow mats are inexpensive.
How is this different from sprouts, which have well-known contamination risks?
Microgreens have a significantly lower contamination risk than sprouts. Sprouts are grown in standing water in warm, dark conditions — ideal for bacterial and fungal growth. Microgreens are grown in a medium with drainage, exposed to air and light. Our microgreens vs. sprouts comparison covers the full safety picture.
Final Thoughts
Most microgreens mold is preventable with three changes: bottom watering only, remove the dome at germination, and use a grow mat instead of soil or paper towels. Most white fuzz is root hairs and requires no action at all.
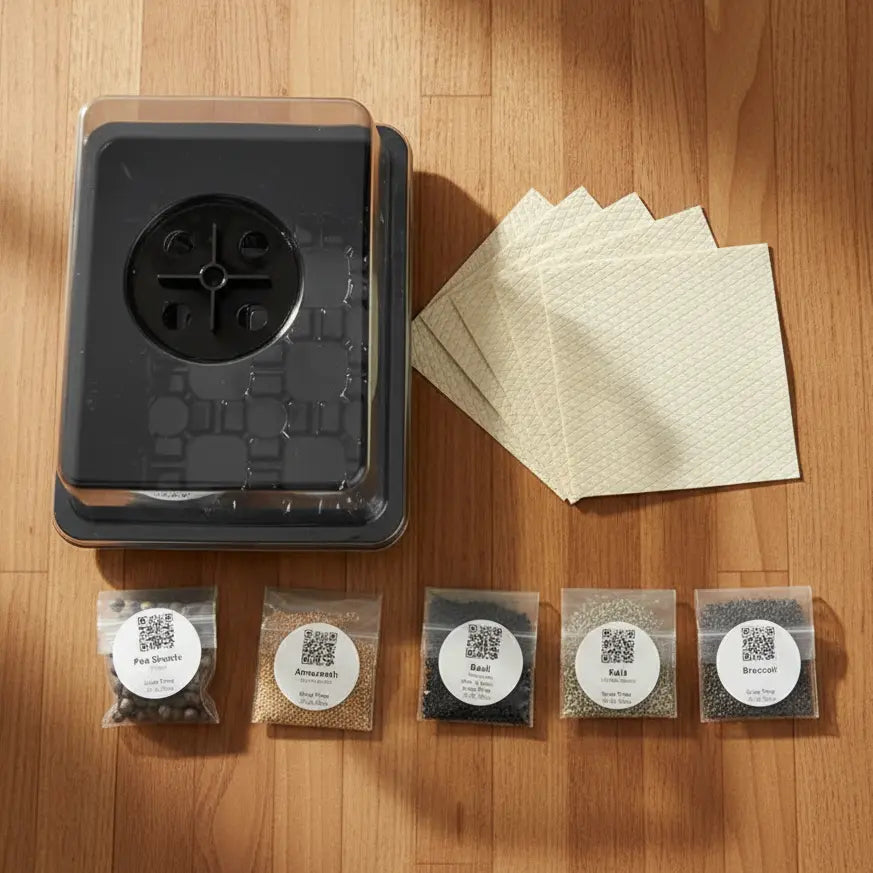
If you’ve failed a tray to mold, you haven’t failed as a grower — you’ve identified the exact condition that needs adjusting. The next tray, with these fixes applied, will almost certainly succeed. The Microgreens Grow Mat is the structural fix that removes the most common mold risk from the equation. The Microgreens Starter Kit includes the mat, tray, and dome together in one purchase.
For after-harvest storage, see our guide on how to harvest microgreens the right way.
Author: Aquager | Published: June 4, 2026 | Updated: June 4, 2026


0 comments