Yes. For the right varieties, in the right season, a south-facing window is completely adequate for growing microgreens. You do not need a grow light to start.
That’s the direct answer this post delivers, because most guides dance around it. The honest version: pea shoots, radish, and sunflower microgreens all grow successfully on a bright windowsill from spring through early fall. Basil, broccoli, and kale are more demanding and will struggle without supplemental light in winter or in low-light apartments. The difference matters — and if you start with the right variety for your window, you’ll have a successful first tray.
This guide covers: how to assess your window’s actual light output, which varieties are window-friendly, what goes wrong when light is insufficient, and what the genuinely low-cost entry point looks like.
When a Window Is Enough (and When It Isn’t)
South-facing, spring through fall: Yes. A south-facing window in the Northern Hemisphere receives the most direct sun throughout the day. From March through September, a good south-facing window typically delivers 4–6+ hours of direct sun — enough for pea shoots, radish, mustard, sunflower, and most other fast-growing microgreens.
East or west-facing: Maybe. Either delivers 2–4 hours of direct sun in good conditions — which works for the most light-tolerant varieties (pea shoots, radish) but will produce slightly leggier stems than a south-facing setup. The result is still usable.
North-facing: Probably not. North-facing windows receive no direct sun in the Northern Hemisphere. Indirect, diffused light can keep seedlings alive but rarely provides enough photosynthetically active radiation (PAR) to produce compact, harvest-quality microgreens. If your only window faces north, a basic LED grow light is the honest recommendation.
Winter, any direction: Reduced. Even south-facing windows lose significant light intensity from October through February. The sun sits lower in the sky, days are shorter, and cloud cover increases. If you want to grow year-round on a windowsill, stick to the most light-tolerant varieties and accept slightly less dense stems.
The Light Check Test
Before deciding whether your window will work, spend two minutes doing this.
Step 1: Identify the direction. Face the window and use a compass app on your phone.
Step 2: The shadow test. On a sunny day between 10 AM and 2 PM, hold your hand 12 inches above the windowsill and look at the shadow it casts.
- Sharp, clear shadow: Good direct light — pea shoots, radish, sunflower will all grow well
- Soft, fuzzy shadow: Moderate indirect light — pea shoots and radish will work; sunflower may be slightly leggy
- No shadow: Insufficient direct light — either move to a different window or plan for a grow light
Step 3: Obstruction check. Look outside. Is there a building, overhang, large tree, or deep balcony blocking part of the sky? These reduce effective light hours even on a directionally favorable window.
Step 4: The phone app method. Apps like Sunseeker or Sun Surveyor can tell you how many hours of direct sun your window receives on any given date. If you want precision, this is the most reliable method.
If your window passes the shadow test with a clear result during spring or summer, you’re ready to grow. Start with the tier list below.
The Window Growing Tier List
These rankings reflect how each variety handles suboptimal light conditions. Tier 1 varieties are the most forgiving; Tier 3 varieties need good light to perform.
Tier 1 — Window-Ready (works on most south, east, or west windows)
- Pea Shoots — Most light-tolerant microgreen. Large seeds contain enough stored energy to produce a substantial harvest even in moderate light. Best first crop for window growers.
- Radish — Fast 5–7 day cycle means less time at risk of legginess. Very forgiving in variable light conditions.
- Sunflower — Thick, substantial stems hold their shape even with slightly less light than ideal. A good south or east window will produce excellent sunflower microgreens.
- Mustard — Extremely fast (5–7 days), bold flavor, handles variable light well.
Tier 2 — Window-Manageable (works on south-facing windows; marginal on east/west)
- Arugula — 7 days; slightly more light-demanding than radish. East windows in spring work well.
- Kale (Kalefetti) — 7–10 days; a good south window in spring and summer works fine.
- Clover — Delicate stems are prone to legginess with insufficient light; south window in good light works.
- Wheatgrass — Handles moderate light well but grows taller and less dense without strong direct sun.
Tier 3 — Grow-Light Recommended (challenging without supplemental lighting)
- Broccoli — Small seeds; becomes leggy quickly without strong light. Can work on a south window in summer but less reliable.
- Basil — Most light-demanding variety. Needs 6+ hours of direct sun minimum. The Tier 3 variety most beginners start with and most often struggle with.
- Cilantro — 10–14 day cycle and moderate light sensitivity. Works on south windows in summer; struggles otherwise.
- Dill — Delicate stems legg easily without consistent direct light.
The Top 3 Window Varieties: Growing Notes
Pea Shoots on a Windowsill
Pea shoots are the definitive window-growing microgreen. Plant them now and harvest in 8–10 days. Their curling pea tendrils and bright green color look genuinely beautiful on a windowsill. For the complete growing guide: Pea Shoot Microgreens: The Complete Beginner’s Growing Guide.
Key window growing note: pea shoots will reach toward light. Rotate the tray 180° on Day 3–4 to ensure even growth across the tray. Without rotation, the front will lean noticeably toward the window. Water by adding ½ cup to the bottom tray every day after the germination phase.
Radish on a Windowsill
Radish microgreens are the fastest option: 5–7 days from seed to harvest. This short window minimizes the time at risk of legginess, making them exceptionally reliable in window conditions. For the full growing process: How to Grow Radish Microgreens: The Complete Step-by-Step Guide.
Key window growing note: radish needs the blackout phase (dome covered, no light) for Days 1–3. Move to the window only after germination is established. Premature light exposure during germination reduces germination rates.
Sunflower on a Windowsill
Sunflower microgreens take 10–12 days but produce the most substantial, nutritious harvest of any window-friendly variety. For the step-by-step: How to Grow Sunflower Microgreens Indoors: Step-by-Step Guide.
Key window growing note: soak sunflower seeds for 4–8 hours before planting. Soaked seeds germinate more evenly and produce tighter coverage across the mat — especially important in window growing where light is already less than ideal.
What Goes Wrong Without Enough Light
Leggy, pale stems are the primary failure mode. The plant is stretching toward a light source that isn’t strong enough — stems elongate to get closer to the light, but the elongated cells are weaker and less nutritious than compact cells formed under adequate light.
Leggy microgreens are still safe to eat and largely nutritious. The appearance and texture are suboptimal, but the harvest isn’t wasted. Fix the light for your next tray.
The fixes for leggy stems:
- Move to a brighter window
- Rotate the tray throughout the day to maximize exposure
- Switch to a Tier 1 variety with higher light tolerance
- If consistently getting leggy stems in any window, a basic LED grow light at 4–6 inches resolves the problem immediately — most cost $15–30
Sparse germination is more often caused by uneven seeding density or insufficient moisture than light. Germination happens under the dome in the dark; light doesn’t affect it. Troubleshoot sparse germination with seeding technique and mat moisture before blaming the window.
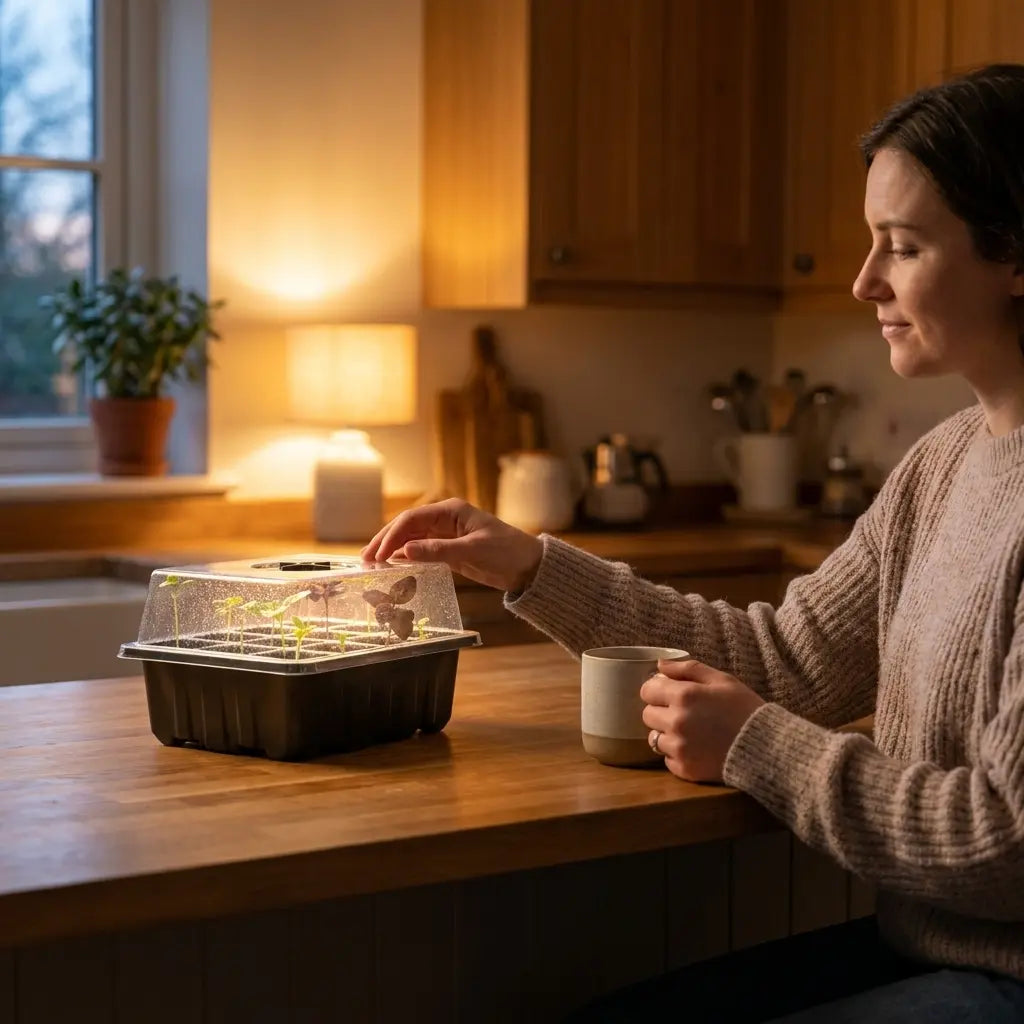
The Low-Cost Beginner Setup
This is the genuine minimum investment for window-based microgreens growing:
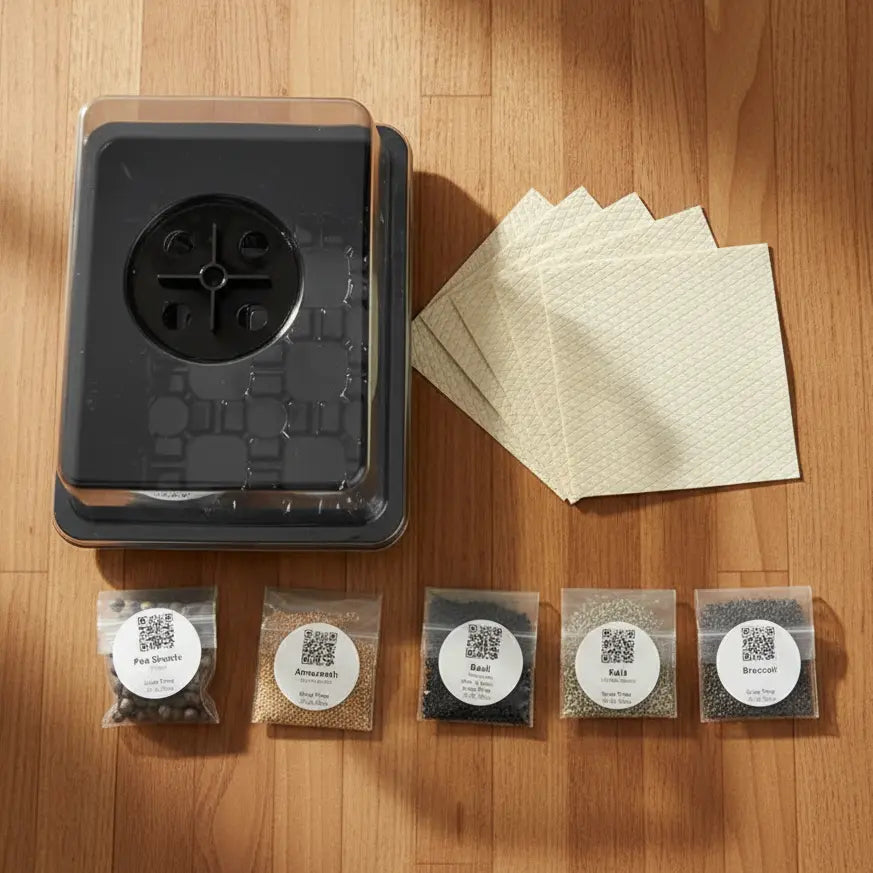
1. Seeds with grow mat included — Pea Shoots ($3.99), Radish Confetti Mix ($3.99), or Sunflower Black Oil ($3.99). Each pack includes a coco coir grow mat.
2. A growing tray — The Microgreens Tray Set of 6 ($39.99) gives you two-tray setups (solid-bottom tray for water, drainage-hole tray for growing) with enough to stagger multiple plantings.
3. A humidity dome — Included in the Microgreens Starter Kit ($24.99), which also includes the tray and grow mat. The most streamlined single-purchase option for a first tray.
Total minimum investment for your first successful window tray: $3.99 (seeds with mat) + a solid-bottom plate or tray you already own. Total for a proper setup with multiple trays: under $50.
When to Upgrade to a Grow Light
A grow light makes sense in three situations:
Winter growing. If you want to grow consistently from November through February, a grow light removes the seasonal restriction entirely. A basic 20W LED panel at 4–6 inches above the tray for 12–16 hours per day produces results equivalent to a good summer south window.
North-facing or obstructed windows. If you don’t have a south, east, or west window with clear sky access, a grow light is the honest recommendation. A $20–30 LED clip light changes everything.
When you want to grow Tier 3 varieties. Broccoli, basil, cilantro, and dill will consistently underperform on anything less than a strong south window. Our guide to growing microgreens in fall and winter covers the full year-round setup including light options.
The important thing: if you have a good south or east window in spring through early fall, you don’t need to make this decision now. Start with Tier 1 varieties on your existing window and upgrade if and when it makes sense.
Frequently Asked Questions
How many hours of light do microgreens need per day?
For Tier 1 varieties (pea shoots, radish, sunflower), 4–6 hours of direct sun is adequate. For Tier 3 varieties (broccoli, basil, kale), aim for 6+ hours or supplement with a grow light.
Can I grow microgreens in an apartment with small windows?
Yes, with the right variety. Pea shoots are specifically well-suited to apartment window growing because of their light tolerance. Start with pea shoots or radish regardless of your window situation.
Do microgreens need direct sun or just ambient light?
Direct sun produces the best results — compact stems, vivid color, higher nutrient density. Ambient indirect light can grow microgreens but typically produces leggy, pale crops. The shadow test in this guide is the most reliable way to assess whether your window provides direct sun.
What if I only have a north-facing window?
A basic clip-on LED grow light is the honest answer. They’re inexpensive ($15–30), use minimal electricity, and produce results that exceed any natural window situation.
Should I get the Starter Kit or just buy seeds with the mat?
If you already have any shallow tray at home, buy just the seeds — each pack includes a grow mat. If you’re starting from nothing and want a purpose-built setup, the Starter Kit is the cleanest single purchase: tray, dome, and mat in one package.
Final Thoughts
Window growing works — and for most people starting out in spring or summer, it’s all you need. Start with pea shoots or radish, do the shadow test on your best window, and plant your first tray this week. You don’t need a grow light to see whether microgreens are something you want to continue.
The Pea Shoots Field Microgreens Seeds are the best first variety for a windowsill — light-tolerant, fast, sweet, and visually rewarding to grow. The Radish Confetti Mix gives you a faster harvest if you want results in under a week. Both include a grow mat. Add the Microgreens Starter Kit for the tray and dome, and your windowsill garden is complete.
Author: Aquager | Published: June 4, 2026 | Updated: June 4, 2026


0 comments