If you want to grow radish microgreens, you've picked the right crop to start with. Radish is the fastest microgreen you can grow — most varieties are ready to harvest in 5 to 7 days from seed. No other crop in the catalog gives you that turnaround.
This guide walks you through the complete process, day by day, from seeding your first tray to your first harvest. Whether you've never grown anything before or you've tried slower crops and given up, this is the guide to bookmark.
By the end, you'll know exactly what to do each day, what to watch for, and how to fix the three problems that trip up most beginners.
Why Radish Is the Best First Microgreen to Grow
There are strong reasons to start with radish before anything else.
Speed. Radish germinates in 24–48 hours and is ready to harvest in 5–7 days. No other microgreen in the Aquager catalog grows faster. You see results before doubt sets in.
Reliability. Radish seeds germinate close to 100% of the time under normal conditions. You won't plant a tray and wonder what went wrong — something will always sprout.
Visible daily progress. Within 24 hours you'll see something happening. Within 48 hours you'll have seedlings. This pace keeps beginners engaged and gives you real feedback as you learn.
Forgiving conditions. Radish tolerates slight over-seeding, minor temperature swings, and imperfect light without failing. It's the most resilient crop in the microgreens lineup.
Bold, usable flavor. Unlike some fast crops that taste watery or bland, radish microgreens have a genuine peppery heat that makes them worth eating. They upgrade any dish immediately — from a grain bowl to a burger.
Compare radish to slower varieties: sunflower takes 10–12 days, pea shoots 8–10, broccoli 7–10. If you want a confident first win, radish gives you the best odds. For a full ranking of the fastest-growing microgreens across all varieties, see our guide to the 5 fastest-growing microgreens.
What You Need to Grow Radish Microgreens
You don't need much. Here's the complete equipment list.
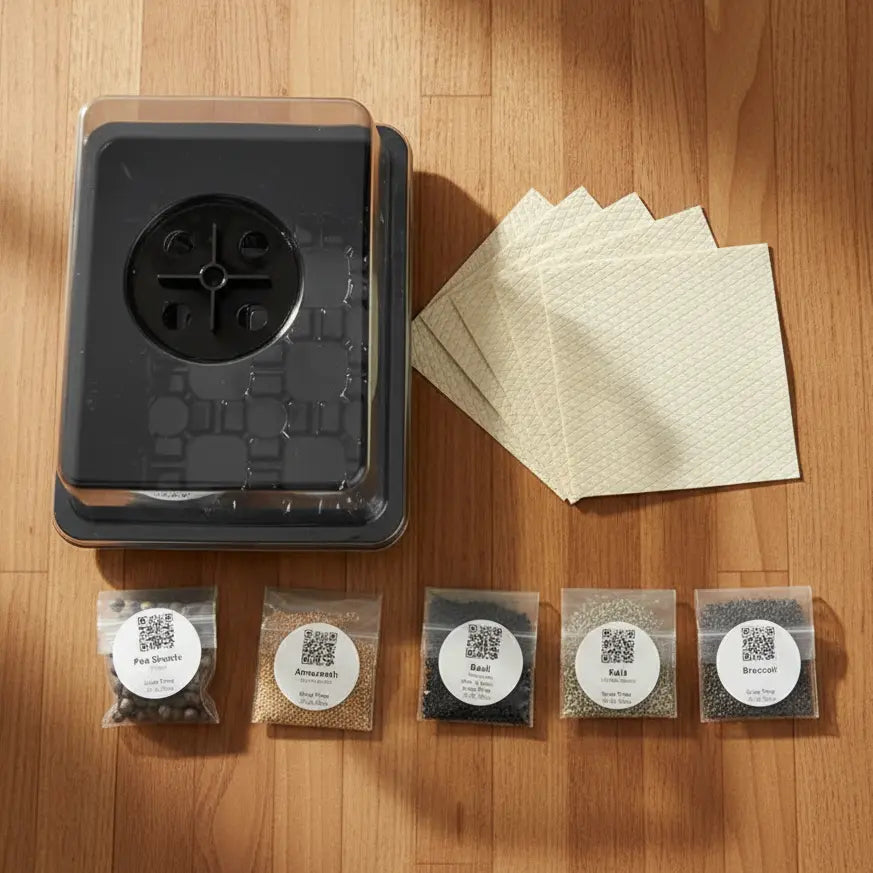
A grow tray — specifically a 10×20 inch tray with drainage holes, plus a second solid-bottom tray underneath to catch water. This two-tray system is how you bottom-water, which is the single most important technique for preventing mold. The Microgreens Tray Set of 6 gives you multiple trays so you can stagger plantings and always have a crop ready.
A grow mat — the growing medium that replaces soil. The Microgreens Grow Mat is made from organic coco coir: it holds exactly the right amount of moisture for germination while draining the excess that causes mold. It's pre-cut for a 10×20 tray and biodegradable after use. You can grow radish on paper towels for a quick experiment, but the grow mat produces consistently better results from tray one.
Radish seeds — specifically the Radish Confetti Mix, which blends red, purple, and green varieties for a visually striking result. Each pack includes a grow mat, so you have everything except the tray to start.
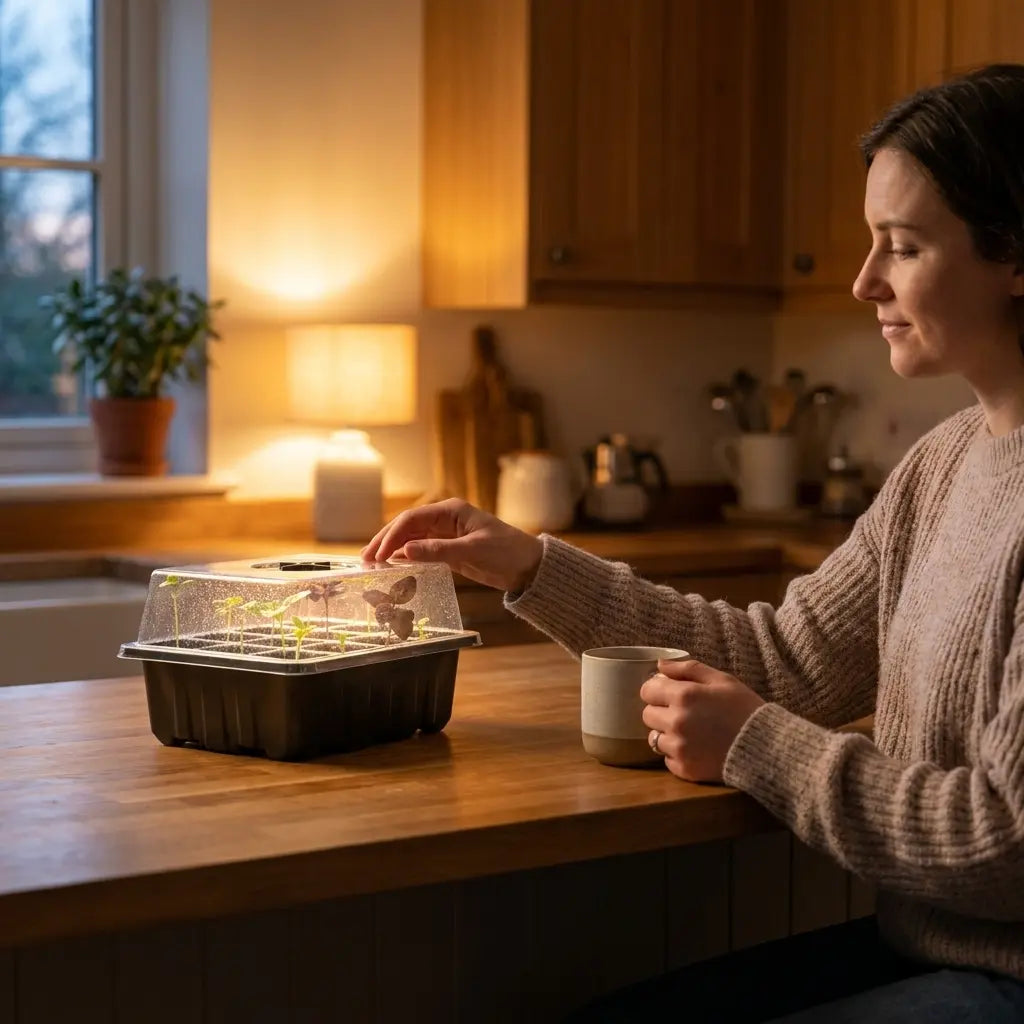
A humidity dome to cover the tray during the blackout phase. This keeps moisture in during germination. It's included in the Microgreens Starter Kit.
A spray bottle for the initial misting.
Water — tap water is fine. Room temperature is better than cold. Radish roots are sensitive to temperature shock, and cold water can slow germination noticeably.
That's it. No grow lights required if you have a south-facing window in spring or summer. No soil. No outdoor space.
Your 7-Day Radish Microgreens Growing Timeline
Here's exactly what happens — and what you do — each day.
Day 1: Seeding
Start by soaking your grow mat. Place it in the solid-bottom tray, pour water over it until fully saturated, then tilt the tray and drain any standing water. The mat should feel damp throughout but not waterlogged.
Scatter radish seeds across the mat. For a 10×20 inch tray, use approximately 1 to 1.5 oz of seeds — enough to cover the mat in a single dense layer with seeds touching but not piling up. Even coverage matters more than exact weight. Bare patches create gaps in your harvest; thick piles cause mold.
Mist the seeds lightly with your spray bottle, just enough to wet the surface.
Cover with the humidity dome. Place the tray somewhere at room temperature (65–75°F is ideal). A cabinet, pantry shelf, or closet all work. No light needed yet.
Days 1–3: The Blackout Phase
The blackout phase mimics the natural conditions of germinating seeds underground. Darkness and humidity are what radish seeds need to start strong.
Check the tray once a day. Your only job is to keep the mat moist. Lift the dome and mist lightly if the surface is starting to dry — but don't overwater. The mat retains moisture well; most growers only mist once or twice during this entire phase.
What you'll see:
- Day 1–2: White root tips emerging from each seed, pressing down into the mat
- Day 2–3: Stems pushing upward, seeds beginning to lift off the surface
- By Day 3: Most seeds germinated, with 1–2 inch pale yellow-white stems reaching upward
If seeds haven't germinated by day 3, check: Is the mat dry? Mist more. Is the room below 60°F? Move somewhere warmer.
Days 3–5: Into the Light
Once most seeds have germinated and stems are reaching upward, move the tray to your light source. Remove the dome.
Light options:
- South-facing window (spring and summer): Adequate for radish microgreens with good sun exposure
- East or west window: Marginal — stems may be slightly leggy but still usable
- LED grow light: Best option year-round; position 4–6 inches above the tray for 12–16 hours per day
What happens: photosynthesis begins. The pale stems start greening within hours of light exposure. The seed leaves (cotyledons) unfurl and flatten out, showing their true color — red, purple, and green depending on the variety in the Confetti Mix.
Switch to bottom-watering now. Pour about 1 cup of water into the solid-bottom tray. The grow mat wicks moisture upward from below. This is how you water from here on — never misting or watering from the top during this phase. Top-watering after germination creates surface moisture that encourages mold on the dense stem canopy.
Check moisture once a day. If the mat feels dry when you press a corner, add more water to the bottom tray. If there's still standing water from yesterday, wait.
Days 5–7: Harvest Time
Your radish microgreens are ready when:
- The cotyledons are fully open and flat (the “butterfly wing” shape)
- Stems are 1.5–3 inches tall
- Color is vivid — deep red, purple, and green across the Confetti Mix
Don't wait for the first true leaf to appear. The cotyledon stage delivers the best flavor, highest nutrient concentration, and most tender texture. Once the first true leaf begins forming, the greens become tougher and slightly more bitter.
To harvest: Use scissors or sharp shears and cut just above the mat surface — roughly ¼ inch above the growing medium. Cut in rows across the tray for clean, even coverage. A 10×20 tray typically yields 2–3 oz of finished microgreens.
Harvest dry. Store in an unsealed container lined with a dry paper towel and refrigerate at 35–40°F. Radish microgreens last 5–7 days. Wash only just before eating — moisture accelerates deterioration in storage.
For the full harvest technique, including how to handle uneven crops and how to store different varieties, see our guide to how to harvest microgreens the right way.
The Simplest Setup for Your First Tray
The Radish Confetti Mix is the fastest path from order to harvest. Each pack includes the seeds and a grow mat — everything except the tray — for $3.99. You'll have your first harvest in less than a week.
For the complete setup in one purchase, the Microgreens Starter Kit includes the tray, humidity dome, and grow mat. Add a pack of radish seeds and you have everything needed to start today — and enough trays to stagger a second planting while the first is still growing.
What Went Wrong? Troubleshooting Radish Microgreens
Almost every problem has a single root cause and a single fix.
White Fuzz on the Stems
The most common beginner panic — and usually not mold.
If the fuzz is uniform, white, close to the stem base, attached to every stem, and disappears when you blow on it → these are root hairs. Radish develops dense root hairs in humid conditions. They're harmless and indicate a healthy plant. No action needed.
If the fuzz is irregular patches on stems or the mat surface, gray-green in color, has a musty smell, or appears on the seeds themselves → this is mold.
Mold fix: Remove the dome immediately. Increase airflow. Switch to bottom-watering only — never top-water again. If mold is extensive and spreading, discard the tray and start fresh with reduced watering. The grow mat is your strongest mold defense — its even moisture distribution prevents the wet surface conditions mold requires.
Leggy, Pale Stems
Stems are tall and thin, yellowish instead of green and upright.
Cause: Not enough light. The seedlings are stretching toward a source that's too weak.
Fix: Move to a brighter position. If your apartment doesn't get adequate direct sun, a basic LED grow light 4–6 inches above the tray for 12–16 hours will fix this on your next batch. Slightly leggy greens on your first tray are still edible — fix the light for tray two.
Uneven Germination
Some areas sprouted well; others are bare or sparse.
Cause: Uneven seeding density. Sparse areas didn't have enough seed-to-mat contact for reliable germination.
Fix: Work in overlapping passes when seeding, as if mowing a lawn. Use a kitchen scale to weigh 1–1.5 oz before scattering so you can calibrate the right amount. Also check that the mat was uniformly wet — dry patches produce sparse germination regardless of seed density.
What to Grow Next
Once you've harvested your first radish tray, the natural question is where to go next.
Sunflower microgreens are an excellent second crop. Slower than radish (10–12 days), but they produce substantial, nutty, crunchy greens with a complete amino acid profile — one of the most nutritious crops in the catalog. Our guide to growing sunflower microgreens indoors covers the full process step by step.
Arugula microgreens are the natural next step if you loved the peppery heat of radish. Arugula is slightly milder and nuttier, grows in 7 days, and is exceptional on pizza, pasta, and grain bowls. For a full heat comparison across the spicy microgreens family, see our radish vs. mustard vs. arugula breakdown.
The best approach for continuous supply: stagger two or three varieties on overlapping schedules. Start radish this week, sunflower next week, arugula the week after. By the time radish is harvested, sunflower is ready. By the time sunflower is eaten, arugula is in. You'll never run out.
Frequently Asked Questions
How many seeds do I need per tray?
1 to 1.5 oz per standard 10×20 inch tray. This provides enough density for good germination without overcrowding. Each pack of Radish Confetti Mix contains enough for one to two full trays.
Do radish microgreens grow back after cutting?
No. Radish microgreens don't regrow from the same mat after harvest. Once cut, the root system won't produce a new flush. For continuous supply, start a new tray every 5–7 days.
Can I grow radish microgreens in winter?
Yes. Radish grows well indoors year-round. In winter you'll likely need a grow light since natural light is reduced, but the process is identical. Keep your growing area between 60–75°F.
How long do radish microgreens last after harvest?
5–7 days refrigerated when stored correctly. Harvest dry, store in an unsealed container lined with a dry paper towel at 35–40°F. Don't wash before storing — moisture significantly shortens shelf life.
Do I need a grow light?
Not always. A south-facing window with 4+ hours of direct sun is adequate from spring through fall. In winter, or with north, east, or west windows, a basic LED grow light makes a meaningful difference in stem thickness, color, and growth speed.
Can I skip the grow mat and use soil?
Soil works with a thin ½-inch layer, but adds weight, mess, and the risk of fungus gnats. The grow mat produces cleaner results with less effort and is biodegradable. For most home growers, the mat is the better choice every time.
Final Thoughts
Radish is the best first microgreen to grow because it gives you results fast — and fast results build the confidence that makes people grow more. Your first tray takes 5–7 days. Your second is easier than the first. By the third, the whole process feels automatic.
The grow mat, the bottom-watering technique, and the day-by-day timeline are the three things that make the difference between a successful tray and a failed one. Get those right and radish will work almost every time.
If you're ready to start, the Radish Confetti Mix includes seeds and a grow mat for $3.99. For the complete setup, the Microgreens Starter Kit has everything together. Either way, your first harvest is less than a week away.
Author: Aquager | Published: June 4, 2026 | Updated: June 4, 2026


0 comments