Winter doesn’t have to end your fresh food supply. While the outdoor garden goes dormant and grocery store greens lose their flavor in transit, your kitchen counter can produce a continuous harvest of nutrient-dense microgreens — every single week, from October through March.
Microgreens are the ideal indoor growing crop precisely because of what makes winter difficult for everything else. They don’t need a backyard. They don’t need a grow season. They don’t need 8 hours of direct sun. A single tray produces a complete harvest in 7 to 10 days, and with the right setup, you’ll have fresh greens on the table every week without interruption.
This guide covers everything you need to know: which varieties thrive in lower winter light, how to set up a simple LED system if your windows fall short, and how to stagger your plantings so you never wait more than a few days for your next harvest. If you’ve been thinking about starting, this is the guide to do it with.
Why Microgreens Are the Perfect Winter Indoor Growing Crop
Most vegetables that people try to grow indoors in winter fail for the same reasons: they need warmth, intense light, and months of growing time before producing anything edible. Tomatoes, peppers, and cucumbers all need 8 or more hours of bright light and months to fruit. Herbs bolt or stall in dry indoor air.
Microgreens sidestep every one of these problems.
Short cycle: The entire grow cycle — seed to harvest — takes 7 to 10 days. There’s no waiting through a long winter. You plant on a Monday and harvest by the following week. That pace works with winter’s disruptions, your schedule, and your attention span.
Low light tolerance: Unlike fruiting vegetables, microgreens only need to grow to the cotyledon stage — the first pair of leaves. They don’t flower, fruit, or develop complex root systems. This means they function in light levels that would stall any other crop. Many varieties grow perfectly on a bright windowsill; even lower-light windows work with a simple supplement.
Nutrient density: A USDA-funded study published in the Journal of Agricultural and Food Chemistry found that many microgreens contain 4 to 40 times the nutrient concentration of their mature vegetable equivalents. In winter, when seasonal produce is at its least fresh and most traveled, a weekly tray of home-grown microgreens is one of the most meaningful upgrades you can make to your diet.
Low cost: Once you have a tray and grow mat, each planting costs roughly $2 to $4 in seeds. A store-bought clamshell of microgreens — when available — costs $6 to $12. Growing at home is more economical and exponentially fresher.
The 5 Best Microgreens for Indoor Growing in Winter
Not every variety handles reduced winter light equally. The following five are the best performers for indoor growing through the colder months — chosen for fast harvest times, tolerance of lower light levels, and nutritional density.
1. Radish Confetti Mix — Ready in 5–7 Days
Radish is the fastest of all microgreens, and speed matters in winter when you want results quickly. The Confetti Mix produces a colorful blend of green, purple, and white varieties in a single tray — striking enough to make any plate look intentional.
Radish handles lower light better than most because of its rapid cycle: it reaches harvest before light deprivation can make stems leggy. Bold, peppery flavor. Works on sandwiches, bowls, avocado toast, and soups.
→ Radish Confetti Mix Microgreens Seeds — $3.99
2. Pea Shoots — Ready in 8–10 Days
Pea shoots are the most forgiving microgreen for beginners and the most tolerant of varied light conditions. Large seeds mean reliable, uniform germination. Sweet, tender flavor that most people — including those who claim to dislike greens — find genuinely appealing.
High in folate, vitamins C and A, and protein relative to other microgreens. Pea shoots add substance to winter salads and grain bowls in a way that most other microgreens don’t.
→ Pea Shoots Field Microgreens Seeds — $3.99
3. Kale Kalefetti Mix — Ready in 7–10 Days
Kale microgreens are significantly milder than full-grown kale — tender, slightly earthy, with a faint peppery note that works in smoothies, eggs, and bowls. The Kalefetti Mix produces green, red Russian, and purple kale in a single tray, making it one of the most visually impressive winter crops you can grow.
High in vitamins K, C, and B vitamins including folate. A daily handful in a morning smoothie adds meaningful nutritional density without any strong flavor.
→ Kale Kalefetti Mix Microgreens Seeds — $3.99
4. Broccoli — Ready in 7–10 Days
Broccoli microgreens contain up to 40 times more sulforaphane per gram than mature broccoli — a compound linked to Phase 2 detox enzyme activation. Mild-flavored, slightly nutty, and works in almost any dish. One of the highest-impact crops you can grow from a nutritional standpoint.
Broccoli microgreens tolerate lower light reasonably well, though they may stretch slightly in deep winter without supplemental light. A simple LED panel keeps them compact and productive.
→ Broccoli Microgreens Seeds — $3.99
5. Clover — Ready in 7–10 Days
Clover is the mildest microgreen in the catalog — almost neutral in flavor, with a delicate texture that blends into anything. It’s the one you add when you want the nutritional benefit without any greenness affecting the taste. High in isoflavones and vitamins.
Clover is also one of the most light-tolerant varieties: its small, fine stems and delicate structure mean it doesn’t stretch noticeably even in reduced winter light.
→ Clover Microgreens Seeds — $3.99
Managing Grow Lights for Winter Indoor Growing
The single most common reason winter microgreens fail is insufficient light. The good news: microgreens need far less light than any fruiting plant, and the threshold is easy to meet.
When a window is enough: A south-facing window in October through February typically provides 4 to 6 hours of indirect light — enough for radish, pea shoots, clover, and kale to reach harvest without becoming leggy. East-facing windows also work for the faster varieties. If your microgreens are reaching toward the light and developing thin, pale stems, they need more.
When to add a grow light: North-facing windows, apartments with limited natural light, or any window blocked by buildings or trees will produce leggy, weak microgreens without supplemental light. The solution is simple and inexpensive: a basic LED grow light strip or bar, mounted under a cabinet or on a shelf above the trays.
What to look for in a grow light for microgreens: A full-spectrum LED panel or strip rated for seedlings — typically between 30 and 60 watts for a standard shelf — is more than sufficient. You don’t need an expensive grow tent setup. A $25 to $40 LED strip on a 16-hour timer will keep your microgreens compact and productive all winter.
Distance matters: Keep the light 4 to 6 inches above the tray canopy. Too far away and the plants still reach; too close and the edges may dry out faster. Adjust as the seedlings grow taller.
A simple plug-in timer set to 16 hours on / 8 hours off is all the automation you need. Set it once and forget it.
How to Stagger Your Plantings for Continuous Harvest All Winter
The most important technique for getting fresh microgreens every week throughout winter is staggered planting — and it’s simpler than it sounds.
The idea: instead of planting one tray and waiting 10 days, you plant a new tray every 5 to 7 days. By the time you’re harvesting the first tray, the second is already mid-cycle. By the time you finish the second, the third is ready. The result is a continuous supply with no gaps.
A practical example with three trays:
| Day | Tray 1 | Tray 2 | Tray 3 |
|---|---|---|---|
| Day 1 | Plant radish | — | — |
| Day 6 | Harvest | Plant pea shoots | — |
| Day 12 | — | Harvest | Plant kale |
| Day 18 | — | — | Harvest |
With just three trays rotating through different varieties and plant dates, you harvest every 5 to 7 days indefinitely.
Variety rotation makes it interesting: Different crops on different trays means you’re eating radish one week, pea shoots the next, kale the week after. This naturally rotates your nutritional intake and prevents palate fatigue. By mid-January you’ll have a system that runs on autopilot.
The minimum setup for staggered growing: Two trays get you alternating harvests. Three trays eliminate almost all gaps. The Indoor Seed Starter Kit 2-Pack — $17.99 — includes two complete tray-and-mat setups for exactly this kind of back-to-back growing cycle.
For detailed timing tips and step-by-step harvest instructions, see: How to Harvest Microgreens the Right Way (Without Wasting Your Crop).
Your Winter Microgreens Setup: What You Actually Need
You don’t need a lot to build a functional winter microgreens setup. Here’s the complete list — and what each item does:
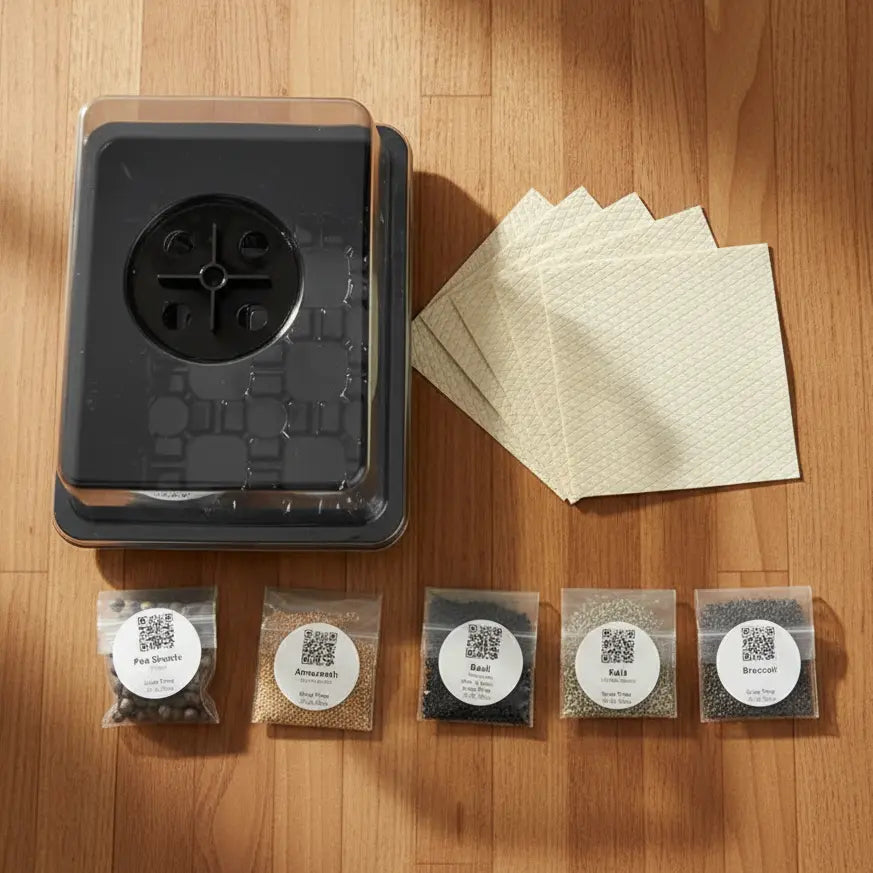
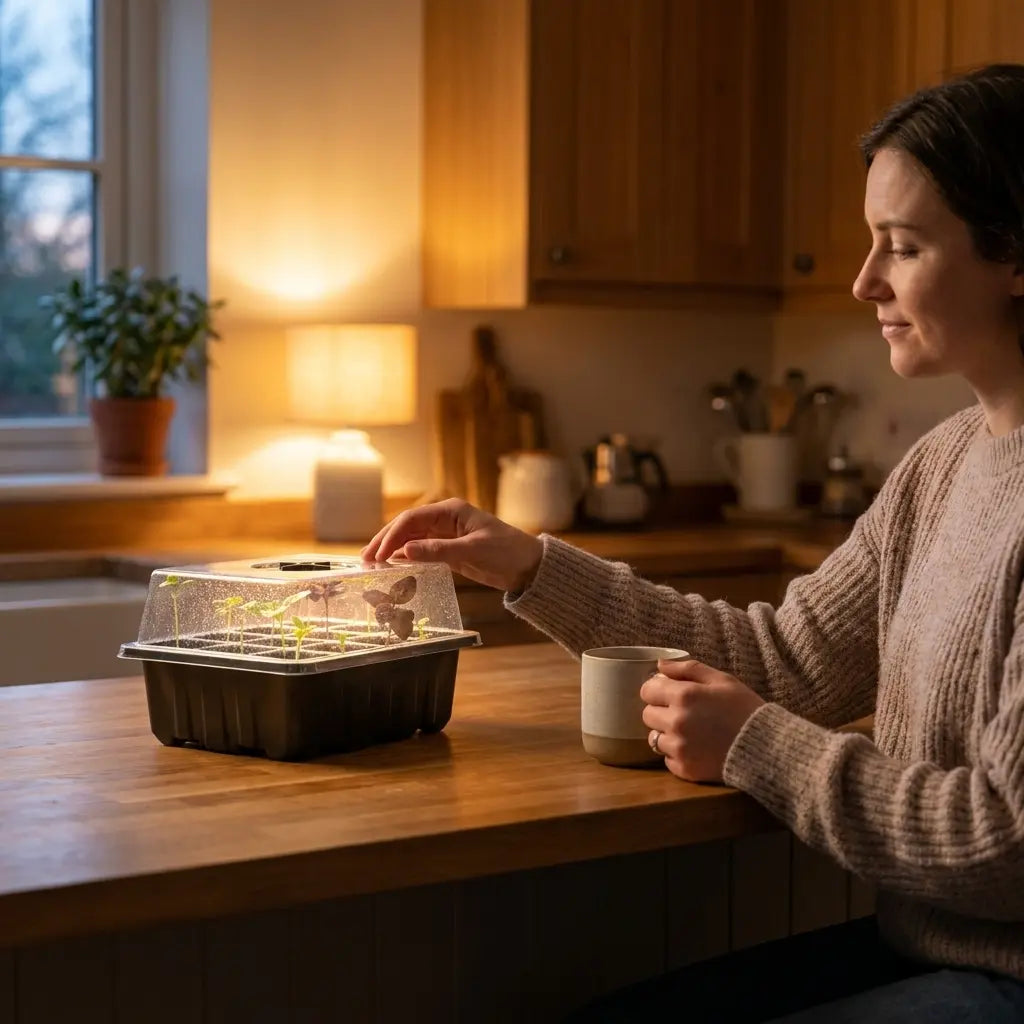
The tray system: A 10”×20” grow tray with a matching dome is the foundation. The dome creates the humidity needed for germination during the blackout phase; the tray holds the water for bottom-watering. The Microgreens Starter Kit — $24.99 — includes tray, dome, and one organic coconut coir grow mat. Everything except the seeds.
The seeds: For a winter rotation system, we recommend starting with three to four varieties to rotate through. The five listed above — radish, pea shoots, kale, broccoli, and clover — are the strongest performers for low-light winter growing, at $3.99 per pack. Each pack includes one grow mat, so your first planting is fully covered.
The 2-pack for staggered growing: The Indoor Seed Starter Kit 2-Pack — $17.99 — is the most efficient way to start a staggered system. Two complete tray-and-mat setups, so you can always have one tray in the blackout phase and one in the light phase simultaneously.
Frequently Asked Questions
Can you really grow microgreens all winter indoors?
Yes. Microgreens are purpose-built for indoor growing — short cycle, low light requirement, no soil needed. Unlike fruiting vegetables that need months and intense light, microgreens reach harvest in 7 to 10 days and grow on a windowsill. With a simple LED supplement in darker months, the system runs year-round without interruption.
What’s the minimum light I need for winter microgreens?
A south- or east-facing window with 4 to 6 hours of indirect light is sufficient for most varieties. If your window provides less, a basic LED grow light strip set to 16 hours daily keeps microgreens compact and productive. Look for full-spectrum LED panels designed for seedlings — inexpensive and simple to set up.
How many trays do I need for weekly harvests?
Two trays, planted 5 to 7 days apart, will give you alternating harvests with minimal gaps. Three trays eliminate virtually all wait time between harvests. The Indoor Seed Starter Kit 2-Pack is designed exactly for this staggered system.
Which microgreens grow fastest in winter?
Radish Confetti Mix is the fastest at 5 to 7 days. Mustard is equally fast. Both handle winter light well because their short cycle minimizes the time that reduced light can affect stem quality.
Do I need to worry about mold in winter?
Winter indoor air is often drier than summer air, which reduces mold risk. Still follow standard protocols: bottom-water only, ensure the tray has adequate airflow, and harvest promptly when ready.
How long do harvested microgreens stay fresh?
Most varieties stay fresh for 5 to 7 days stored dry in a covered container in the refrigerator. Pea shoots and radish hold especially well. For maximum freshness and nutrient content, harvest and use the same day whenever possible.
Start Your Winter Growing System This Week
The window for getting a continuous winter harvest running is now — not in November when the motivation usually kicks in and the setup feels urgent. Start today and you’ll have your first harvest before the end of next week. Build a three-tray rotation and you’ll have fresh microgreens on the table every week through February, with no gaps, no grocery runs, and no waiting.
For a complete step-by-step walkthrough of the growing process from seed to harvest, read our full beginner’s guide: How to Grow Microgreens at Home: The Complete Beginner’s Guide. And if you’re combining microgreens with a broader fall strategy, our guide on How to Grow Microgreens in Fall and Winter (Year-Round Fresh Greens) covers the seasonal transition in full.
The Microgreens Starter Kit gets you growing with one tray. Add the seed varieties you want to rotate through, and your winter indoor growing system is complete.
Author: Aquager
Published: June 1, 2026
Updated: June1, 2026


0 comments